Tag Archives: easy

Potato and aubergine Sabzi

13 Apr

This is yet another beautiful recipe shared by my friend Monica. It is one of her mother’s recipes and one of Monica’s favourites and I can see why, it is absolutely delicious.

Before I share the recipe I would like to share a very interesting article Monica wrote on basmati rice.

“The Story of Basmati Rice – The crown Jewel of Indian Cuisine, In Foreign land people try to achieve the biryani that they ate in a indian restaurant or rice dishes that they ate during their trip to India. They try to get all the possible spices to put in a biryani and yet they buy a regular Basmati Rice available in Regular Non Indian Supermarkets and fail to get the same result of each rice grain fragrant and apart in a Biryani. Also in today’s time where Brand is all what people talk about, they buy a particular branded Rice and yet fail to achieve the result.
By reading this article you will know how to choose best Basmati Rice for your home. People who like to stick to points can directly go to the bottom of article and people who like stories and culture around a food can continue to read on.
When I was a child, I accompanied my mother to grocery stores and at that time we didn’t get branded rice, dal or flours but yet we ate the best quality food. My mother would touch the grain, smell it, see the size and colour of it and would choose the best one. I am sharing the same with you all today.
A Good Basmati Rice is at minimum aged 2 years, So does it mean the older the basmati rice, the better it is. “Oh Yes” As the years pass the long grain basmati rice changes it’s colour from white to off white and the fragrance of rice increases. It also means that Basmati Rice doesn’t have any expiry date if it is well stored.
My Mom would buy a quintal of Rice, Wheat, Dals and Whole Spices and would store it well in Big Metal Drums, she used dried Neem Leaves(Its a medicinal tree with bitter leaves and stems) to prevent grains from getting any pests. Before making rice she would spread grains on a plate to check for any stones and wash it 2-3 times and then cook. It is important to wash it 2-3 times until the water is clear so when you cook the rice the grains don’t stick due to presence of starch.
Off Topic – It was also a tradition in India when a girl got married the parents gifted her metal drums and utensils to make her own kitchen in the new home, though now since big companies have started packing things in plastic and in small bags, and also we do not live in joint families anymore plus we often eat outside (when I was child until 12, we only ate out when travelling) we do not need these big drums to store our Rice and Grains, But still my mom followed the tradition (knowing I am getting married to an NRI and I can never take those drums and utensils with me to Spain) she bought me those drums, filled it with homemade sweets and papad for my Husband’s entire family and also for distribution. (Well In India you can’t stop your parents or family to do anything in your wedding, they like to fulfill all their dreams in their daughter’s wedding)
Back to Rice – To retain the fragrance and taste we do not drain water (except in some dishes), we have ratio of water and rice (depends on the kind of basmati rice you have got, since my mother bought in bulk she would understand the ratio and apply it for the rest of the Rice) plus we add some oil or ghee and salt. I do remember from my childhood and even now when we cook a good basmati rice I can eat it just plain.
Also I find how previous generation cared for optimum use of energy sources, they were better at planning important things like meal (Not like us who would want every thing ready to use like pastes, frozen food etc) which not only fed their family better quality food but also saved expenses on cheap meals and medical bills due to malnourishment(well this is an entirely different topic, coming back to Basmati Rice) They did soak it for 30 mins before putting it to cook which saved Gas, time and also make the rice fluff up and evenly cooked. And they did the same for lentils, beans, chickpea etc.
Here are the Pointers for making a perfect Basmati Rice”

Thank you Monica!

Here is the recipe. We had it as a side dish but it would be great as a main and perfect with other small dishes to have with puri. I hope you enjoy it.

Potato and aubergine Sabzi – serves 2 as a main or 4 with other small dishes

  • 1 large, firm aubergine
  • 2 medium waxy potatoes
  • 1/2 tablespoon fennel seeds
  • 1 teaspoon turmeric
  • 2 tablespoons vegetable oil
  • Red chilli powder to taste

1. Cut the aubergine and potatoes into small cubes, about 1/2 inch

2. Put some vegetable oil, about 2 tbsp, into a pan and add 1/2 tbsp of fennel and 1 tsp turmeric. Make sure the seeds don’t burn. When it start to smell fragrant add the vegetables and mix well to cover with the spices.

3. Cover and on the lowest heat cook gently until the potatoes are tender and the aubergine is soft and creamy. Check on it occasionally to make sure it’s not catching. It can take anything from 15 minutes to 45 minutes depending on the size and type of potatoes etc.

4. When cooked add some red chilli powder to taste 🤣🤣

Seafood spaghetti

5 Jul

It’s been over two years since I last posted on my blog, partly due to illness. As part of my recovery plan I decided to tackle my health head on and get into peak fitness. Eighteen months later and nearly three stone lighter, thanks to Slimming World, I am just about there.

So, today is a new beginning for my blog. I will not be posting as often as before and will only be posting recipes I have made up myself, using the principles of Slimming World. I’ve been dying to try this recipe which has been floating around in my head ever since I first had a seafood pasta dish in a local restaurant. I’ve used all fresh ingredients and the finished dish was delicious, even if I do say so myself. I’m sure some of my Italian friends will be appalled but hope they will forgive me some creative inspiration. The chilli gives a bit of a kick but doesn’t overpower the dish and can be omitted if you like. Likewise, mix and match the seafood to suit your own personal taste. Cooking is about adventure, having fun and taking a few risks. Go for it, I’m sure it will turn out well but if not there is always the chippy.

Seafood spaghetti.         Serves 2 – 3

  • Spray Olive oil or Frylight
  • 1 onion, roughly chopped
  • 1 large or 2 small cloves garlic, crushed
  • 4 small tomatoes, roughly chopped and seeds discarded
  • 1 good pinch dried chilli flakes (option all)
  • 50 mls dry white wine
  • small bunch basil, leaves roughly chopped
  • 125g raw king prawns
  • 125g cooked mussels
  • 1 small jar Calamari antipasti, drained and rinsed
  • Dried spaghetti, enough for 2-3 people
  1. Spray a large skillet or nonstick frying pan with oil or Frylight. Heat gently then add the onion and garlic. Fry over a medium heat for about 10 minutes until the onion is soft but not coloured.
  2. In the meantime cook the pasta in boiling salted water.
  3. Add the tomatoes and continue to fry for about 5 minutes until softened then add the wine and cook for a couple of minutes more.  Add the prawns and fry for 5 minutes until pink and cooked through. Add the chopped basil, mussels and squid. Season with salt and freshly ground black pepper. Mix gently and cook over a low heat until everything is warmed through.
  4. Drain the spaghetti, reserving some of the cooking liquid, and add to the seafood. Toss everything together, adding a little of the reserved cooking liquid if it looks too dry.


This slideshow requires JavaScript.


Lemon Drizzle cake

4 Oct

DSCI0165I rarely make cakes but I made this an exception as I was preparing a High Tea for friends.  The lemon drizzle gave the cake a lovely crunchy top and a delicate lemon flavour to the sponge which, on reflection, was very similar to a Madeira cake.

We only ate about a third of the cake so I have frozen the remainder and will use another time to make a pudding. I have a lovely raspberry and sherry trifle in mind or maybe just make a summer berry compote to drizzle over it and serve it with fresh cream. Lovely.

I mentioned above I was preparing High tea, but maybe this was Afternoon Tea. So what is the difference?

Afternoon tea is served around 4.00pm. When afternoon tea became fashionable in the early 19th century, thanks to the Anna, the Duchess of Bedford it was never intended to replace dinner but rather to fill in the long gap between lunch and dinner at a time when dinner was served at 8pm. Lifestyles have changed since those times and afternoon tea is now a treat, rather than a stop-gap.

High Tea means different things to different people. The origins of Afternoon Tea show clearly this was the preserve of the rich in the 19th century. For workers in the newly industrialised Britain of the time ‘tea’ had to wait until after work and be substantially more than just tea and cakes. Workers needed sustenance after a day of hard labour, so the after work meal was more often hot and filling and accompanied by a pot of good, strong tea to revive flagging spirits.

The addition of High is believed to differentiate between the Afternoon Tea served on low, comfortable, parlour chairs or relaxing in the garden and the worker’s High Tea served at the table and seated on high back dining chairs.

Today, the evening meal in working class households is still often called ‘Tea’ but as working patterns have changed yet again, many households now refer to the evening meal as supper. (About.com)

Well, here is a link to the recipe and my , not very good, slideshow.

Lemon Drizzle Cake                     Cuts into 10 slices

http://www.bbcgoodfood.com/recipes/4942/lemon-drizzle-cake

This slideshow requires JavaScript.

Chicken and vegetables with Soy Noodles

30 Sep

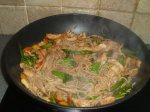
DSCI0104   I know I have said this before but I love Chinese food. It is quick, easy, healthy and, usually, cooked in one pan so saves on the washing up.  This recipe was a little unusual as it contained some spices I would normally associate with Indian food rather than chinese. Does that make it a fusion dish? I wouldn’t like to say as this terminology still confuses me. Regardless of whether it is fusion or not it tastes absolutely wonderful.

I found the original recipe on the Kikkoman web site but have changed it quite a bit to use ingredients I had to hand. It still tasted absolutely wonderful and is one dish I will be making again and again.

Here is the recipe.

Chicken and vegetables with soy noodles       Serves 2 -3

  • 150g thin or medium egg noodles
  • 2 tbsp groundnut oil
  • 1 pack of tender stem broccoli and asparagus tips
  • 1 orange pepper, deseeded and cut into chunks
  • 4 spring onions, trimmed and sliced
  • 1 tbsp raw peanuts, toasted
  • 2 skinless chicken breasts cut into thin strips
  • 1/2 tsp ground cumin
  • 1 tsp ground coriander
  • 1/2 tsp hot chilli powder
  • 2 tbsp kikkoman Less Salt Soy Sauce
  • 1 tbsp rice wine
  1. Cook the noodles as per pack instructions, drain and keep warm.
  2. Heat 1 tbsp of the oil in a wok, add the pepper, broccoli, asparagus and spring onions. Stir fry over a brisk heat for 5 minutes. Add the peanuts, stir fry for 1 minute then remove from wok and set aside.
  3. Add the remaining oil to the wok , heat and stir fry the chicken for 5 minutes. Add the cumin, coriander and chilli powder and stir fry for another minute.
  4. return the vegetables to the wok and toss with the chicken. Add the noodles, soy sauce and rice wine. Toss everything together until piping hot then serve in warmed bowls.

This slideshow requires JavaScript.

Mediterranean Baked haddock

6 Sep

DSCI0094  As I get older I find I am eating much more fish than I am meat. It isn’t that I don’t like meat but I seem to be going off the consistency.  I thought that by increasing the amount of fish I eat in my diet the healthier I would become but this may not be so.

Some fish, such as king mackerel, shark, and swordfish, are consistently high in mercury, which can harm the nervous system of a fetus or young child. Certain other fish, including canned light tuna, are also occasionally high in that metal. While the health effects of sporadic exposure are unclear, our fish safety experts think that women who are pregnant, nursing, or may become pregnant, as well as young children, should take special precautions. The risk posed by mercury in fish to other people is less established, though in general the heavier you are the more fish you can eat. Certain other contaminants sometimes found in fish, such as dioxins and PCBs, have been linked to some cancers and reproductive problems. While it’s unclear whether the levels typically found in fish pose health effects, a few types may have lower levels of those pollutants. For example, some studies suggest that wild salmon may contain less mercury than farmed salmon.

On the other hand, fish is the only food that directly supplies large amounts of the omega-3 fatty acids that have been shown to cut the risk of heart attack and stroke. Omega-3s may also elevate mood and help prevent certain cancers, cognitive decline, and eye disease. Most people can get enough by consuming fatty fish at least twice a week. Good choices include salmon and sardines, since they’re also low in mercury. People who already have coronary heart disease require about a gram a day of those fatty acids, an amount that frequently requires taking a supplement.

So, I guess the answer is to eat fish in moderation, just like all other food groups. Did I really need to listen to experts to come to that conclusion?

Well, here is the recipe.  It is based on Mediterranean ingredients and tastes lovely. If you are cutting down on carbohydrates this is the perfect meal served with green vegetables.

Mediterranean Baked Haddock.              Serves 2

  • 2 Haddock fillets, skinned
  • 1 tbsp olive oil
  • 1 onion, chopped
  • 400g can crushed tomatoes
  • 1 tsp capers
  • 1 clove garlic, crushed
  • about 12 pitted black olives (I used Kalamata)
  • Salt and freshly ground black pepper
  1. Heat the oven to 200C/180C fan/gas 5.
  2. Lay the fish in an oven to table dish and season lightly.
  3. Heat the oil in a frying pan and gently fry the onion until it is soft but not coloured (takes about 10 minutes).
  4. Add the tomatoes and simmer until reduced by 1/3, then add the olives, capers and garlic.  Simmer for 2 minutes then pour over the fish.
  5. Bake the fish in the oven for 10 to 15 minutes (depends on thickness of fillets) or until the fish is cooked and is opaque and flaky.
  6. Serve immediately with green vegetables and new potatoes if you like.


This slideshow requires JavaScript.


Cheese and potato Frittata

29 Jul

imageI love frittatas. They are quick, easy to cook and great with salad for a light lunch or part of a Tapas meal. This frittata is more substantial than most and is delicious hot or cold. In fact, I think I prefer it cold so it’s a good job that there are usually leftovers so we can snack on them whenever we feel peckish.

This frittata is baked in the oven so no need to turn it in the pan which can be very messy. You will need, however, a frying pan that can be transferred from hob to oven.

Cheese and potato Frittata.          Cuts into 8 pieces

  • 500g waxy potatoes, peeled and sliced into rounds
  • 1 tbsp vegetable oil
  • 1 onion, chopped
  • 6 large eggs
  • 2 oz cheddar cheese, grated
  • 1 tbsp chopped parsley
  • salt and black pepper
  1. Preheat the oven to 190c/180c fan/gas 6.
  2. Cover the potatoes with water, add a little salt then bring to the boil. Turn down the heat and cover, simmer for 5 minutes until just tender.  Drain and cover with a clean tea towel to absorb the steam.
  3. Heat the oil in a frying pan and gently cook the onion for about 10 minutes until soft and just turning golden.
  4. Add the potatoes to the onion and crush down slightly. Fry gently until just turning golden and starting to crisp.
  5. Meanwhile, break the eggs into a bowl. Add the cheese and parsley then season with salt and pepper. Beat until combined then tip the potato mix into the eggs and coat completely.
  6. Add a little more oil into the frying pan and tip the eggs and potatoes in. Even out and allow to cook gently until the bottom is set and turning golden. Transfer to the oven and bake for 15 minutes or until the eggs are set and golden on top.
  7. Leave for 1 minute then loosen the edges and transfer to a plate ready for serving.

This slideshow requires JavaScript.

Thai Green Chicken and Asparagus curry

11 Jul

DSCI0311I have always been a bit nervous about Thai curry. I suppose it is because I imagine them to be ferociously hot as there are often a lot of chillies in Thai food.  This curry proved me wrong. I enjoyed every mouthful and, for once, could actually have had seconds if there was any left to have!  The other thing I liked about this recipe is that it is so healthy.

The recipe uses coconut milk so here are a few bits of trivia on coconuts.

  • There is some disagreement on where coconuts originated.  Some think it was around New Guinea in the Pacific Ocean whilst others think it was in the American tropics. Unfortunately neither can support their argument with real proof.
  • Near Port Royal, Jamaica a stone monument on the Palisadoes commemorates the planting of the first coconut tree on the island on March 4, 1869.  Over the next 20 years, 20,000 coconut trees had been planted but most of these eventually died through disease.
  • Falling coconuts kill 150 people every year – 10 times the number of people killed by sharks.
  • Coconut oil was the world’s leading vegetable oil until soybean oil took over in the 1960s.
  • There are more than 20 billion coconuts produced each year.
  • Coconut juice or coconut water is the liquid inside a coconut.
  • Coconut milk is produced by steeping grated coconut in hot water then straining; coconut cream is coconut milk cooked down until it thickens, or grated coconut steeped in hot milk instead of water.

Well, here is the recipe. It is quick and very easy but unfortunately you can’t freeze.

Thai Green Chicken and Asparagus Curry          Serves 2 – 3

  • 1 tsp groundnut oil
  • 2 large skinless chicken breasts, cut into bite sized pieces
  • 1.5 tbsp Thai green curry paste
  • 2 shallots, finely sliced
  • 1 tsp dark soy sauce
  • 1 tsp fish sauce
  • 200 ml light coconut milk (make sure to shake can well before opening)
  • 200g asparagus, woody end removed and sliced into 2 inch pieces
  • 2 tbsps of mixed chopped basil and coriander leaves
  1. Heat oil in a wok over a high heat and stir fry the chicken until starting to go brown all over.
  2. Add the curry paste and stir until the chicken is coated then fry for another minute.
  3. Add the soy sauce, fish sauce and shallots then pour over the coconut milk. Mix well then bring to the boil. Turn down the heat and simmer for 10 minutes.
  4. Add about 50 ml of water to the sauce to loosen then add the asparagus. Cover the wok and simmer for about 5 minutes or until the asparagus is tender and the chicken cooked through.
  5. Mix in the herbs then serve immediately with boiled rice.

This slideshow requires JavaScript.


Courgettes with pasta, my favourite pasta dish!

1 Jul

 There was a time when I hated courgettes but, over the years and after trying so many delicious recipes, that has all changed.  I love it when there is a glut of courgettes in the shops but, thankfully, you can now buy them all year round.  When we had this recently it reminded me how much we love it, and how long it had been since we ate it!  I can’t remember when we first had this dish, it must be at least five years ago.  I think our first time was because someone had given us a bag full of courgettes, they were not a vegetable I would have actually bought in those days!  The recipe would probably have come from one of the cooking journals I subscribe to and, if I remember, the picture did not look that tantalising.  I am so glad we tried it though.  Sometimes you come across a recipe that you want to make time and time again.  This is one of those times! We absolutely love this pasta dish.  You would not believe how fresh it tastes or how much flavour it packs in.  Before the recipe though, I thought I would look at some food trivia on Parmesan Cheese.

I can remember, many years ago, buying Parmesan cheese already grated and served in little tubs.  It was disgusting and smelled of sweaty socks.  Yuk!!!  The first time I bought fresh Parmesan I could not believe the flavour.  It is so strong, absolutely beautiful.  It really makes you wonder how they manage to transform such a great taste to an imitation of sweaty socks!!  A lot of people will not buy the fresh cheese as it is expensive and they may only use it occasionally.  Believe me, it is worth the expense!  I grate the whole block at a time and freeze it in a well sealed freezer bag.  That way I can take out just as much as I need when I need it.  I even freeze the rind, it gives a great flavour to soups!

Parmesan cheese is the French name given to Parmigiano-Reggiano, and one that most of the UK have adopted.  Parmigiano-Reggiano is a hard, granular cheese that is cooked but not pressed, and is produced in Italy.  The name is protected under European Law and can only be given to the cheese produced in specified regions of Italy.  Informally it is often called the ‘King of Cheese’.  The cheese is made out of cows milk and any left over whey is used to feed the pigs from which Parma Ham was produced.  Great bit of recycling!!!  The cheese is as pure and organic as possible.  Cows can only feed on grass or hay, giving grass-fed milk, and only natural whey culture is allowed as a starter.  The only additive allowed is salt which the cheese absorbs while being submerged in huge vats of brine made from Mediterranean sea salt, before being left to age for an average of two years.  The end result is a fantastic cheese with a deep, savoury flavour.  It is very strong so, although expensive, you only need a small amount yet still get the full flavour coming through.

Anyway, I’ve tried to trace the recipe to a website and failed so I have written it out for you below.  I really hope you give it a try, I am sure you will not be disappointed.

Courgettes with pasta and herbs.    Serves 4       About 530 calories

  • 12 oz/350g  spaghetti
  • 4 tbsp olive oil
  • 2 garlic cloves, finely chopped
  • 650g/1lb 7oz courgettes, cut into thin ribbons (a vegetable peeler is great for this)
  • 25g/1oz butter cut into pieces
  • 50g/2oz freshly grated parmigiano-Reggiano (or Grand Padano if you can’t get it)
  • Handful each of chopped fresh basil and flat leaf parsley
  1. Cook the spaghetti as per packet instructions.
  2. Meanwhile, heat the olive oil in a large frying pan or wok.  Add the garlic and cook gently for a few seconds until it becomes fragrant.  Be careful not to let it burn or it will be bitter.  Tip in the courgettes, stir to coat in the garlic oil then cook gently for about 4 minutes.  They need to be softened but not soggy.
  3. Drain the spaghetti and add to the courgettes, along with the butter, cheese and herbs.  Toss them gently until the butter has melted, the spaghetti is coated with the cheese and herbs and the courgettes are evenly distributed.  Season to taste and serve immediately.  You can drizzle with a little extra olive oil if you like.

    This slideshow requires JavaScript.

Briam – a Greek version of baked mediteranean vegetables. Delicious!

28 Apr

There are a host of recipes for roasting vegetables and most Mediterranean countries have their own speciality.  Briam is Greece’s offering to the mix.  It is unusual in that the vegetables cook slowly so that the tomatoes melt down and combine with the olive oil and onions to make a delicious sauce.  I have made this dish many times, we love it so much. It is hard to believe just how easy it is and yet pack such a punch with the flavours.  Whenever we go abroad, no matter where it is, we invariably have this to accompany a meal at least once and it is great to have with friends as all the cooking and preparing can be done well in advance. It is also a great dish to have in the winter, the flavours reminding you of the summer just gone and the promise of one to come.

Volumes have been written about the Greek diet and, before that, the Cretan diet. Based on a healthy lifestyle, the Greek diet makes the best use of natural and organic ingredients cooked without a heavy reliance on saturated fats and processed foodsTraditional Greek cooking grew out of a rural lifestyle lived by people who were poor in the economic sense, but wealthy in imagination and creativity. A few basic guidelines ensure that Greek foods are at their very best in taste, nutrition, and economy.

  • Seasonal: Keep it Fresh – most Greeks shop daily and use whatever meat and vegetables that are in season.
  • Scratch: Start at the Beginning – Greek food is made from scratch, rarely using comercially made ingredients.
  • Simple: Fabulous Taste with Time-tested Methods – Greeks love to keep their food simple so that the flavours of the meat and vegetables are enhanced by herbs and spices rather than the latter taking over.
  • Slow: Don’t Rush It – for generations food has been cooked slowly in Greece and the aromas during cooking evokes memories of their mothers cooking and their Grandmothers before her.

The vegetables are cooking slowly in the oven and the smell is absolutely divine.  Here is the recipe.

Briam                                                                       Serves 4

  • 3 fl oz olive oil
  • 1 onion sliced
  • 2 red onions quartered
  • 4 medium-sized waxy potatoes, peeled and sliced into thick rings
  • 2 medium or 3 small courgettes, cut into 1/2in chunks
  • 4 medium-sized ripe tomatoes, roughly chopped
  • 1 red pepper, deseeded and cut into rings
  • 1 green pepper, deseeded and cut into rings
  • 2 large cloves garlic, finely chopped
  • 1 tsp. dried oregano
  • 1 tbsp. chopped fresh dill
  • 3 tbsp. chopped fresh parsley
  • Salt and freshly ground black pepper
  • 120ml/4 fl oz boiled water
  1. Preheat the oven to 170C/150C fan/Gas 4.  Heat 2 tbsp. of the oil in a frying pan and fry the sliced onion over a low heat until it is softened but has not turned colour.  Should take about 10 minutes.  Remove from the heat.
  2. Combine all the other vegetables, garlic, herbs and seasoning with the onions, in a large shallow ovenproof dish.  Add the water and drizzle with the remaining oil, toss well then cook for about 2 hours until the vegetables are tender and cooked through.  Turn them about every half an hour throughout this process.  When cooked remove from the oven and keep warm.  (These are best served warm rather than hot and can even be served cold the next day with a slice of feta cheese for lunch)

    This slideshow requires JavaScript.

Chilli chicken and broccoli noodles

2 Mar

DSCI0598I cannot tell you how wonderful this dish is.  Not only is it delicious but it is quick and really easy to make.  I was a bit concerned when I saw I had to add sugar to the sauce but it gave a wonderful caramelised finish to the dish. Never again will I be phased or put off trying a savoury recipe that has sugar in the ingredients.

I would not normally make Chinese food if I am having guests for dinner as I’ve found recipes can be hit or miss and also because all the cooking is done when the guests are there so it can be quite stressful. I might make an exception for this one though as you can blanch the broccoli and noodles in advance as long as you warm them through properly before you serve.

The one change I would make to the dish is to cut the chicken thigh meat into smaller pieces, perhaps about 1 inch, as it was difficult to know when they were cooked through when quartered. Mind you, keep an eye on them as you don’t want the chicken to dry out and many, including myself, have a habit of over cooking chicken to make sure it is cooked properly.

Here is a link to the recipe.  Serves 2

http://www.olivemagazine.com/recipes/chilli-chicken-and-broccoli-noodles/4020.html

This slideshow requires JavaScript.