Tag Archives: Curry

Samosa Chaat

21 Aug

Chaat or chat is a family of savoury snacks that originated in India, typically served at the roadside from stalls or food carts across the Indian subcontinent in India, Pakistan, Nepal and Bangladesh. There are many variations. The recipe below is using samosas as a base but my friend Monica has given me another recipe that has potato patties as a base. It sounds delicious and, when I have made it, I will add the recipe to my blog so you can all enjoy it.

Chickpea Curry Serves 2 hungry people

  • 4 tablespoons vegetable oil
  • ¾ teaspoon cumin seeds
  • 1 medium onion, finely chopped
  • ¾ tablespoon ginger and garlic paste
  • 1 birds eye green chilli, finely chopped
  • 200g can chopped tomatoes, pureed
  • ¾ teaspoon turmeric powder
  • ½ teaspoon red chilli powder
  • ¾ teaspoon cumin powder
  • 20g butter
  • ¾ teaspoon of salt to taste
  • 250g chickpeas from a tin, drained
  • 80ml water
  • ¾ teaspoon pomegranate molasses
  • ¼ teaspoon raw mango powder
  • 2 tablespoons fresh chopped coriander
  • ¾ teaspoons garam masala
  1. Heat the oil in a saucepan and then add the cumin seeds and sizzle for about thirty seconds
  2. Then add the chopped onions to the saucepan and cook until the onions are golden brown, this should take about 5-7 minutes on a medium heat
  3. When the onions are golden brown, add the ginger and garlic paste and green chilli to the onions and cook for about a minute
  4. Add blended plum peeled tomatoes to the saucepan together with the turmeric, red chilli powder, cumin powder, salt and butter
  5. Cover saucepan and cook masala for a good 10 minutes (stirring in-between), add water if masala starts to dry up
  6. Once masala is sizzling and the butter and oil has seeped from the edges, add drained chickpeas, mango powder and pomegranate molasses together with the water for moisture, cook for a 3-4 minutes
  7. Add final touches of garam masala and chopped coriander, cook for a final 1-2 minutes and remove from the heat.

Construct the Chaat

  • 5 Vegetable Samosas, cooked and hot
  • ½ Medium Red Onion, finely chopped
  • Chickpea curry
  • A drizzle of Tamarind sauce
  • 3 Tablespoons natural Greek Yoghurt, seasoned with 1 teaspoon cumin, ½ teaspoon salt and ¼ teaspoon black pepper
  • 2 tablespoons fresh Coriander, finely chopped
  • 1 Tablespoon Nylon Sev, optional, garnish
  1. Cut the samosas into bite sized pieces and share between 2 bowls
  2. Sprinkle over a dessert spoon full of chopped red onions
  3. Spoon over some chickpea curry
  4. Add a tablespoon of seasoned yoghurt
  5. Drizzle over tamarind sauce
  6. Garnish with coriander and a tablespoon of nylon sev
  7. Serve
Advertisement

Potato and aubergine Sabzi

13 Apr

This is yet another beautiful recipe shared by my friend Monica. It is one of her mother’s recipes and one of Monica’s favourites and I can see why, it is absolutely delicious.

Before I share the recipe I would like to share a very interesting article Monica wrote on basmati rice.

“The Story of Basmati Rice – The crown Jewel of Indian Cuisine, In Foreign land people try to achieve the biryani that they ate in a indian restaurant or rice dishes that they ate during their trip to India. They try to get all the possible spices to put in a biryani and yet they buy a regular Basmati Rice available in Regular Non Indian Supermarkets and fail to get the same result of each rice grain fragrant and apart in a Biryani. Also in today’s time where Brand is all what people talk about, they buy a particular branded Rice and yet fail to achieve the result.
By reading this article you will know how to choose best Basmati Rice for your home. People who like to stick to points can directly go to the bottom of article and people who like stories and culture around a food can continue to read on.
When I was a child, I accompanied my mother to grocery stores and at that time we didn’t get branded rice, dal or flours but yet we ate the best quality food. My mother would touch the grain, smell it, see the size and colour of it and would choose the best one. I am sharing the same with you all today.
A Good Basmati Rice is at minimum aged 2 years, So does it mean the older the basmati rice, the better it is. “Oh Yes” As the years pass the long grain basmati rice changes it’s colour from white to off white and the fragrance of rice increases. It also means that Basmati Rice doesn’t have any expiry date if it is well stored.
My Mom would buy a quintal of Rice, Wheat, Dals and Whole Spices and would store it well in Big Metal Drums, she used dried Neem Leaves(Its a medicinal tree with bitter leaves and stems) to prevent grains from getting any pests. Before making rice she would spread grains on a plate to check for any stones and wash it 2-3 times and then cook. It is important to wash it 2-3 times until the water is clear so when you cook the rice the grains don’t stick due to presence of starch.
Off Topic – It was also a tradition in India when a girl got married the parents gifted her metal drums and utensils to make her own kitchen in the new home, though now since big companies have started packing things in plastic and in small bags, and also we do not live in joint families anymore plus we often eat outside (when I was child until 12, we only ate out when travelling) we do not need these big drums to store our Rice and Grains, But still my mom followed the tradition (knowing I am getting married to an NRI and I can never take those drums and utensils with me to Spain) she bought me those drums, filled it with homemade sweets and papad for my Husband’s entire family and also for distribution. (Well In India you can’t stop your parents or family to do anything in your wedding, they like to fulfill all their dreams in their daughter’s wedding)
Back to Rice – To retain the fragrance and taste we do not drain water (except in some dishes), we have ratio of water and rice (depends on the kind of basmati rice you have got, since my mother bought in bulk she would understand the ratio and apply it for the rest of the Rice) plus we add some oil or ghee and salt. I do remember from my childhood and even now when we cook a good basmati rice I can eat it just plain.
Also I find how previous generation cared for optimum use of energy sources, they were better at planning important things like meal (Not like us who would want every thing ready to use like pastes, frozen food etc) which not only fed their family better quality food but also saved expenses on cheap meals and medical bills due to malnourishment(well this is an entirely different topic, coming back to Basmati Rice) They did soak it for 30 mins before putting it to cook which saved Gas, time and also make the rice fluff up and evenly cooked. And they did the same for lentils, beans, chickpea etc.
Here are the Pointers for making a perfect Basmati Rice”

Thank you Monica!

Here is the recipe. We had it as a side dish but it would be great as a main and perfect with other small dishes to have with puri. I hope you enjoy it.

Potato and aubergine Sabzi – serves 2 as a main or 4 with other small dishes

  • 1 large, firm aubergine
  • 2 medium waxy potatoes
  • 1/2 tablespoon fennel seeds
  • 1 teaspoon turmeric
  • 2 tablespoons vegetable oil
  • Red chilli powder to taste

1. Cut the aubergine and potatoes into small cubes, about 1/2 inch

2. Put some vegetable oil, about 2 tbsp, into a pan and add 1/2 tbsp of fennel and 1 tsp turmeric. Make sure the seeds don’t burn. When it start to smell fragrant add the vegetables and mix well to cover with the spices.

3. Cover and on the lowest heat cook gently until the potatoes are tender and the aubergine is soft and creamy. Check on it occasionally to make sure it’s not catching. It can take anything from 15 minutes to 45 minutes depending on the size and type of potatoes etc.

4. When cooked add some red chilli powder to taste 🤣🤣

Quorn, mushroom and red pepper curry – tastes great.

25 Jul

As I have got older I have eaten less meat and more vegetarian dishes.  I have to say that I am still persevering with Quorn but dishes like this one are so tasty it is difficult to detect the Quorn.  It isn’t the flavour, it’s the texture I am having to come to terms with, although there is no doubting, it is much healthier than eating meat for every meal.  I made this recipe up as I went along, using tips I had picked up from some of my favourite chicken curry recipes.  I was delighted with the outcome.  It might even make me a convert!

I used a curry paste in the recipe.  As the Quorn readily absorbs flavours I chose a medium strength paste but, off course, you can vary this to suit your palate.  Here is a bit of information that may help you make an informed choice.

Curry pastes are a mist blend of herbs and spices and are used as a base for many curry recipes.  There are a number of different Thai curry pastes, each imparting their own specific flavour to the dish.

Red curry pastes usually include red chillies, shrimp paste, lime leaves, shallots, garlic, galangal, lemongrass, coriander and seasoning.

Green curry paste is the same as the red except it uses green chillies.

Yellow curry paste gets its colouring from turmeric and, occasionally, yellow chillies.  The other ingredients are as above.

Massaman curry paste is based on Indian cuisine and includes a number of dried spices such as cumin, cloves, cinnamon and cardamom.

All the above are quite spicy so take care how much you add if you don’t like your food too hot.  Phanaeng curry paste is milder though.

Patak make curry pastes with a wide range of heat ratings.  Mild pastes include Korma, Tandoori and Tikka.  Medium are Balti, Bhuna, Jalfrezi, Rogan Josh and Biryani.  Hot are Garam Masala, Madras, Vindaloo and Kashmiri Masala.

Quorn, mushroom and red pepper curry                             Serves 4  (can freeze)

  • 1 tbsp sunflower oil
  • 2 medium onions, finely chopped
  • 2 tbsp medium curry paste (I used Patak’s Balti paste)
  • 6 fresh baby plum tomatoes, quartered
  • 150g button mushrooms
  • 1 red pepper, seeded and cut into chunks
  • 350g Quorn chicken style pieces
  • 1 tbsp fresh lemon juice
  • 4 tbsp full fat Greek yogurt
  • 3/4 pt hot water
  • 1 level tsp salt
  • 1 tsp fresh mint, chopped
  • 1 tbsp fresh coriander, chopped
  1. Heat the oil in a large pan and gently fry the onion until soft and turning golden (should take about 10 minutes).  Stir in the curry paste, lemon juice  and tomatoes and cook for 1 minute more.
  2. Add the mushrooms, pepper and Quorn pieces  and gently mix so they are all coated with the spice mix.  Cook over a low heat for about 10 minutes.
  3. Meanwhile, in a measuring jug, whip the yogurt then gradually add the hot water then the salt.
  4. Gradually add the yogurt mix to the quorn, stirring continually.  Bring to the boil then simmer for 20 minutes.
  5. Add the herbs then serve with rice or naan bread. 

    This slideshow requires JavaScript.

Keema curry – so versatile and great for kids!

18 Jul

For those who do not know it, keema curry is made from minced beef.  This dish is great for kids as it is mild and really tasty.  It is versatile too.  I use it to make stuffing for my Whole Curried Poussin (recipe to follow at a later date) and it goes great with jacket potatoes for a healthy supper.  Make lots as it freezes really well without the peas, as these have been frozen once.  Just add the peas before reheating, fantastic.  Apparently, Keema curry is one of the least favourite choices in Indian cuisine.  I am as guilty as the next person for never trying it in an Indian restaurant but I will definitely make it more often at home in the future.  Always buy good quality mince meat otherwise you will have a greasy meal but, other than that, this recipe is virtually indestructible.  It is great for novice curry cooks as there is no risk of overcooking the meat or the meat being too chewy and, in the current climate, it makes a fantastic meal for pennies!  Any type of mince will do, even quorn or soy mince for vegetarians.

When mince pies where first made in the 16th Century, they contained shredded meat that was bulked out by dried fruit and spices.  The spices were brought over from the Holy Land and it was thought important to add three spices to the pies to represent the gifts taken to Jesus by the Three Wise Men.  There are a few superstitions about mince pies.  Being a Derbyshire lass I always like to know about these so I have listed a few below.

  • It was thought lucky to eat one mince-pie on each of the Twelve Days of Christmas, ending on the 6th January. 
  • Bad luck would also be the curse if you stir the mincemeat the wrong way when making it.  Always stir it in a clockwise dierction.
  • Refusing a piece of mince pie at Christmas dinner means you will have bad luck for the coming day. Some sources, on the other hand, say you’ll have bad luck for a whole year. So eat up.
  • Mince pies should always be eaten in silence.
  • Never cut a mince pie with a knife as you will cut your luck.
  • Make a wish when you eat your first mince pie of Christmas.

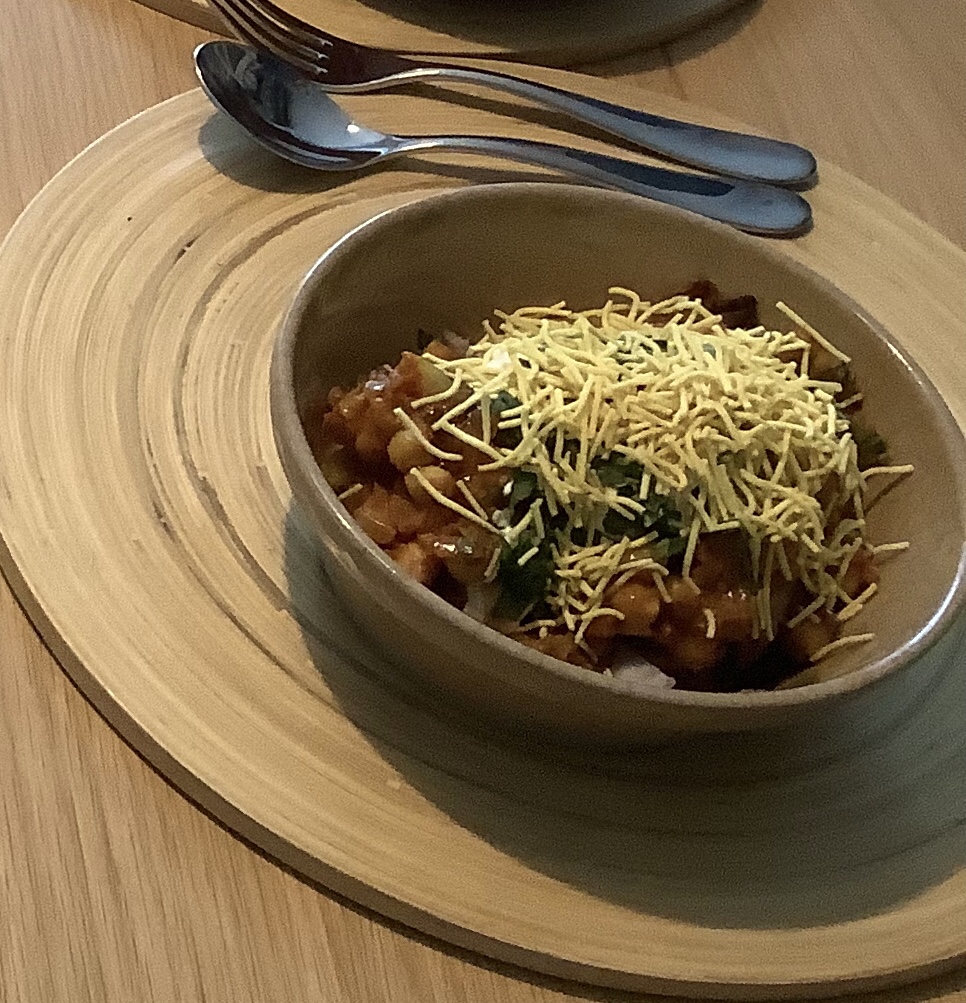
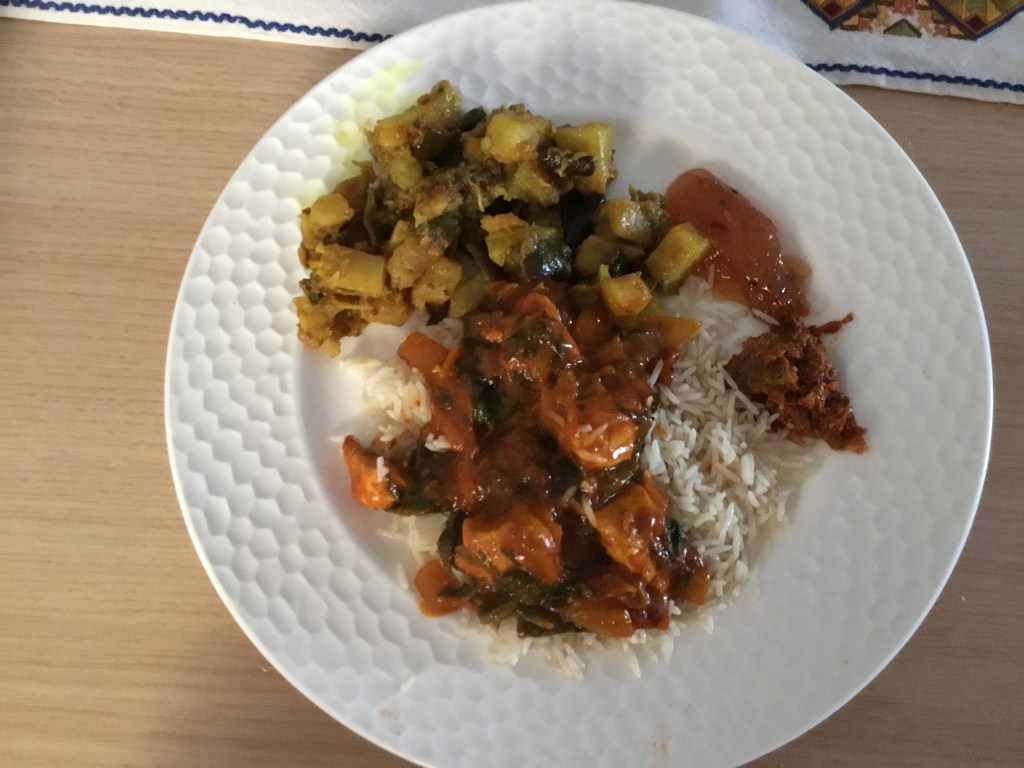
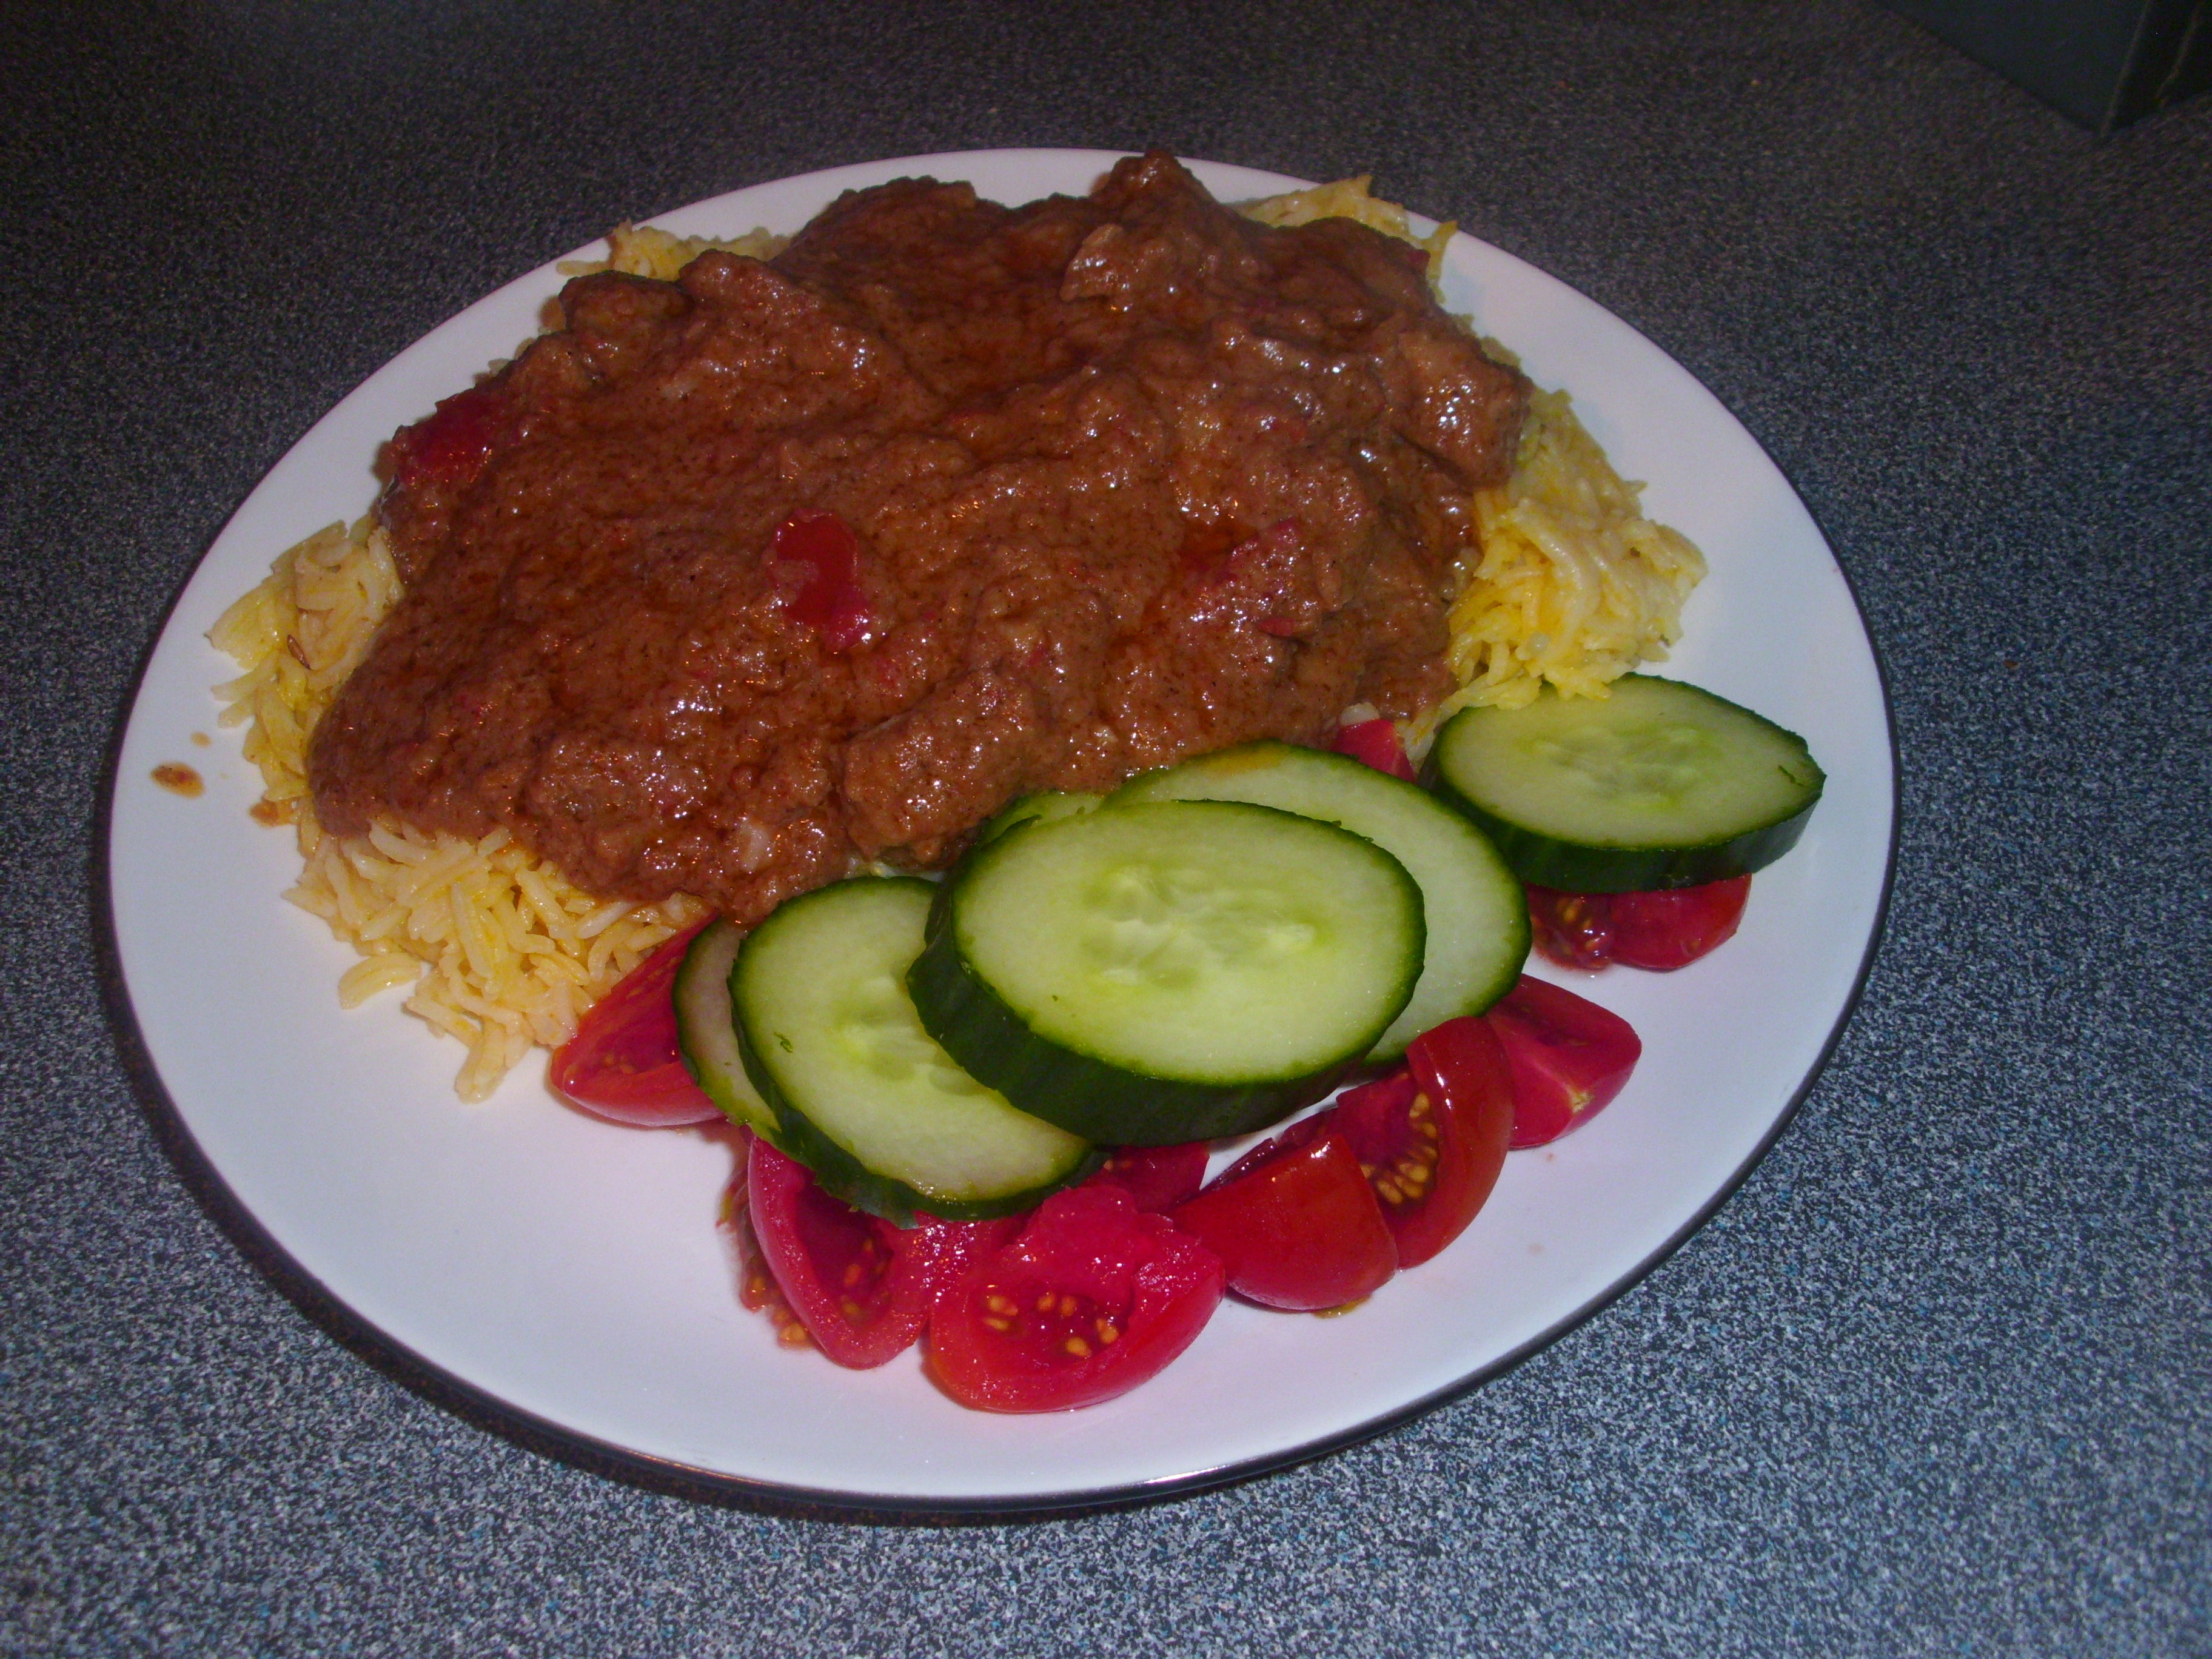
Well here is the recipe.

Keema curry                                                  Serves 6

  • 2 lb lean minced meat (beef, pork, lamb, chicken or vegetarian options)
  • 2 tbsp unsalted butter
  • 1 large onion, finely chopped
  • 2 cloves garlic, finely chopped
  • 2 inch piece of root ginger, finely chopped
  • 1 tsp turmeric
  • 1 tsp ground coriander
  • 1/2 tsp red chilli powder
  • 4 cloves, ground
  • 1 brown cardamom, ground
  • 400g can chopped tomatoes
  • 1 tbsp tomato ketchup
  • 200ml canned tomato soup (I use Heinz)
  • 1 red pepper, chopped
  • 1 green or red chilli, chopped finely
  • 2 tbsp garam masala
  • 1 tbsp chopped fresh coriander
  • 1 tbsp chopped fresh mint 
  • Handful of frozen peas
  • Wedges of hard-boiled egg to garnish (optional)
  1. Heat half the butter in a large, lidded saute pan and fry the mince for about 10 minutes until brown all over.
  2. In a separate pan or wok, heat the remaining butter and stir fry the onion, ginger and garlic over a medium heat until golden.  Add the turmeric, ground coriander, chilli powder, cloves and cardamom.  Mix well, adding a little water if the mix seems too dry.
  3. Preheat the oven to 190C/180cC fan/gas 5.  Add the stir fry to the mince with the tomatoes and ketchup.  Mix well, cover and cook in the oven for 20 minutes.
  4. Take the dish out of the oven and stir in the soup, red pepper, chilli and garam masala.  Return to the oven and continue to cook for a further 30 minutes. 
  5. Switch off the oven and remove the dish.  Stir in the peas, mint and coriander.  Return the dish to the oven for a few minutes to enable the peas to warm through.
  6. Freeze at the end of Step 5 in rigid containers if required and thaw completely before reheating.
  7. Serve with rice, garnished with wedges of boiled egg if desired.

    This slideshow requires JavaScript.

Chicken Dopiaza – delicious!

8 Feb

Most Friday nights we go out early doors for a few drinks and a catch up with friends, then home for a home-made curry.  When we were first married I used to hate curry but my husband has loved it since college when he used to visit Abdul’s in Swansea and have a madras with half chips and half rice.  I remember the first curry I made.  A friend gave me the recipe and it was really just vegetable stew with some curry powder in.  Yuk!!!  I think the turning point was when friends from Walsall came for the weekend, armed with a home-made chicken curry made from fresh spices.  Since then I have never looked back!  I always use fresh spices nowadays, unless I make a Chinese Curry.  Did you know you can actually buy Chinese Curry Paste and make a really authentic tasting Chinese Curry!

The curry I made last night was Chicken Dopiaza (Chicken with Onions).  Do means two and piaz means onions in Hindi so the term describes a dish that has used onions in two different ways or has double the ration of onions to meat.  This dish comes from Bengal and is traditionally Muslim.  I think this is the best Chicken Dopiaza I have ever tasted.  Takeaways and those eaten in restaurants do not compare!  It can be a bit fiddley but well worth the effort.  You can make it in advance, in fact it tastes even better if left to mature for a day in the fridge, and I have frozen it successfully as well so great for left overs or if you are only cooking for two and want a ready meal for another time.

First a bit of trivia – today lets look at cinnamon.

Cinnamon has been used a  highly valued spice since before Christ.  There are records of it first being imported into Egypt in 2000 BC, and it is frequently mentioned in the Bible (Hebrew).  The spice is taken from the inner bark of a Cinnamon Tree.  Once dried the bark curls up, producing the more recognised cinnamon sticks you can buy today.  Its flavour is due to an aromatic oil which makes up about 1% of its composition.  Cinnamon’s medicinal benefits range from curing common cold, relieving rheumatism, aiding digestion and helping some menstrual problems.  It is a natural food preservative and helps relieve diarrhoea, possible reasons for including it in cuisine of hot countries where meat quickly deteriorates.

I have tried many recipes for Chicken Dopiaza, but this is the one I love the best.  It comes from a small recipe book titled ’50 great curries of India’, written by Camellia Panjabi (ISBN 1-84509-264-3). It’s a great book and I highly recommend it if you love curry.  I have adapted this to suit our tastes so buy the book for the original recipe.

Chicken Dopiaza                                                              serves 4

  • 1 small roasting chicken cut into 8 pieces or 3 chicken breast cut into bite sized pieces
  • 5 medium onions
  • 1.5 tsp red chilli powder
  • 3 tbsp full-fat yogurt, whisked
  • 50 ml sunflower oil
  • 1 plump garlic cloves, finely chopped
  • 1 cinnamon leaves or bay leaves
  • 2.5cm (1in) cinnamon stick
  • 4 cardamoms
  • 3/4 tsp peppercorns
  • 6 cloves
  • 1 whole red chillies
  • 1 tbsp ginger puree
  • 1/2 tsp turmeric
  • 2 tomatoes, chopped
  • 1 tbsp butter
  • pinch sugar
  • salt
  • 1 tsp garam masala
  1. Cut 2 of the onions in half. Chop 1 coarsely.  Blend the remaining 2 and squeeze to extract the juice, discarding the pulp.
  2. Mix the chilli powder with a little water to form a paste.
  3. Heat the oil in a heavy based pan and fry the chopped onions.  Remove and reserve, leaving the remaining oil in the pan.
  4. Grind the cardamoms, peppercorns and cloves together
  5. In the pan, fry the garlic, bay leaves, cinnamon stick, ground spices and whole chillies.
  6. After 30 seconds add the ginger puree, chilli paste, turmeric and garam masala, stirring continuously.  Add the chicken and tomatoes, followed by the butter, yogurt and sugar.  Mix carefully to coat the chicken in the spice mix and then cook for 10 – 12 minutes, making sure the spices do not stick to the bottom of the pan.  Add a little water if it looks like it is getting too dry.
  7. Add the onion halves, followed by the onion juice and salt to taste.  Stir for 2 – 3 minutes then transfer to a casserole and bake in the oven, preheated to 150C/325F/gas mark 3 and cook for 20-25 minutes or until the chicken is cooked through.  Mix in half the fried onions.
  8. Serve, sprinkling the remaining fried onion on top.

I serve this with chutney and pilau rice.

Hope you enjoy it. 

This slideshow requires JavaScript.

The best Lamb Curry I have ever made!

3 Jan

DSCI0297This is a recipe from Rick Steins India cookbook and was given to him by Mr Singh.  On the TV series of the same name he talked about Sikhs and how he ad yet to meet an unpleasant Sikh and I entirely agree with him, although I am sure, by the law of nature, that there must be some out there.  All I know is that whenever I have seen or met a sikh they are always incredibly smart with well trimmed beards. They have always been very friendly and helpful.  Most male Sikhs have Singh (lion) and most female Sikhs have Kaur (princess) as their last names.  When they are baptised male Sikhs must cover their hair with a turban, but for female Sikhs this is optional. The greater Punjab region is the historical homeland of the Sikhs, although significant communities exist around the world.

This recipe uses shoulder of lamb. In the past I have opted for leg of lamb for my curry recipe, mainly because my husband hates fatty or chewy meat.  This time I decided to go along with the shoulder option and, although I did cut out excessive fat and all sinews that I could find, I did leave in some of the fat. The result was the tenderest most succulent lamb I have ever tasted. i will definitely be using shoulder of lamb in future for any slow cooked recipes.

I have previously provided a link to this recipe on the BBC website but, as they have now removed it, here it is.

Mr Singh’s Slow-cooked lamb curry with cloves and cardamom   Serves 4 – 6

  • 8 cardamom pods
  • 4 – 6 cloves
  • 3 medium onions
  • 200g tomatoes
  • 10 cloves garlic
  • 4cm root ginger
  • 75 ml vegetable oil
  • 100 ml full fat natural yoghurt
  • 700g boneless lamb shoulder, trimmed of excess fat and cut into 4 cm pieces
  • 1 tsp salt
  • 1 tsp Garam Masala
  • 1 tsp hot chilli powder
  • 1 tbsp single cream
  1. Grind the cardamom and cloves into a powder and set aside.
  2. Using a mini processor roughly chop the onion then add a little water and process to a puree. Set aside.
  3. Rinse processor then blend tomatoes to a puree. Set aside
  4. Rinse processor the blend garlic and ginger with a little water. Set aside.
  5. Heat the oil in a heavy based pan over medium heat and gently fry the onion puree for about 15 minutes until golden.  Add the  ginger and garlic paste and continue to fry for another 3 minutes. Stir in the yoghurt then ad the meat and mix well so it is coated. Season with the salt then cook over a low – medium heat for 30 minutes until browned.  Stir in the Garam masala and chilli powder, cook for about 30 seconds then pour over enough water to barely cover the meat. Cover and simmer for 40 minutes.
  6. Stir in the cream and tomatoes then the cardamom and cloves mix. Cover the pan with foil then replace the lid and cook over the lowest heat for 40 minutes or until the lamb is tender.

This slideshow requires JavaScript.

Prawn Balti – what a fantastic curry!

24 Apr

There are times when only a curry will do and last night was one of them.  I’m not a lover of fish curries but absolutely love prawn curries.  This is the first time I have tried to make this recipe and the taste was unbelievable, spicy and fairly hot but also somehow fresh tasting.  Delicious!  I served it with plain boiled rice and threw on a vegetable samosa (don’t ask me why, I just fancied one).

There is a bit of controversy as to why these currys are called Balti.  Some say it is because they originated in Pakistan in the Baltistan region of Kashmir.  Others say they are named after the pan in which the curry is cooked and that they originated in Birmingham.  One thing for sure, Birmingham certainly made Balti dishes popular.  I remember being taken to Sparkhill in the 1980’s to have my very first Balti.  Originally this is where you would find Balti Houses, on and behind the main road between Sparkhill and Moseley.  It was a real experience for me.  The restaurant was more like a cafe, hard chairs and a glass-topped table under which you could read the menu.  It was brightly lit, no romantic lighting here!  If you wanted to drink alcohol you had to take your own and the owners would willingly open it for you and the Naan bread was the size of the table leaving hardly any room for the actual Balti pans.  I loved it! The people were really friendly and the food was fantastic.  Obviously, today you can choose a Balti curry from the menu of most Indian restaurants but they will never compare to my first experience of eating one.

Anyway, here is the recipe.  It is definitely one worth trying if you like curries.

Prawn Balti                           Serves 4 (easily halved)

  • 3 tbsp/45 ml sunflower oil
  • 1 inch piece of root ginger, peeled and cut into thin strips
  • 1 large onion, finely chopped
  • 2 tsp/ 10 ml garlic paste
  • 3/4 tsp ground cardamom
  • 1/2 tsp ground cumin
  • 1/2 tsp fennel seeds
  • 1/2 tsp hot chilli powder
  • 1/2 tsp ground turmeric
  • 7 oz/200g tomatoes, chopped
  • 1 tbsp/15 ml tomato puree
  • 1 lb/500g raw peeled prawns
  • 1 tsp/5 ml salt
  • 1/2 tsp dried fenugreek leaves, crumbled
  • 1/2 tsp garam masala
  • 6 fl oz/175 ml warm water
  • 1/2 oz chopped fresh coriander or flat leaf parsley
  1. Preheat a Balti pan (if you have one) or a large frying pan over a medium heat.  Add the oil and, when hot, stir-fry the ginger for 30 seconds.  Add the onion and stir-fry for about 7 minutes or until the onion is soft and just starting to turn brown.
  2. Add the garlic, cardamom, cumin, fennel, chilli and turmeric.  Reduce the heat slightly and stir-fry for about 30 seconds.  Add the tomatoes and stir-fry for 4-5 minutes or until cooked down slightly.  Add 50 ml/ 2 fl oz of water and continue cooking until the water is absorbed and the il floats on the surface.
  3. Add the tomato puree, prawns, salt, fenugreek and garam masala. Stir fry for about 2 minutes.  Add the water, increase the heat slightly and stir fry for about 4 minutes more or until the prawns are pink and cooked through.  Stir in the coriander or parsley and serve immediately.

    This slideshow requires JavaScript.

Curry night! Murgh-Saag (Chicken with Spinach) tonight.

16 Apr

There are some people who have never tried spinach and think they hate it.  I would really encourage you to try this dish.  It may just change your mind about spinach for ever!  The flavours in this curry are absolutely stunning.  I can honestly say it is the best chicken and spinach curry I have ever tasted and I think I am a bit of an expert on such things, as I always choose Chicken Saagwala when we eat out!

Murgh-Saag is a Punjabi dish, originating from the Punjab region of northwest India and east Pakistan.  Saag dishes are usually spinach based when bought in the UK.  Elsewhere they can be made from mustard leaves.  Traditionally Saag dishes are served with Indian breads such as Roti or naan, although some areas prefer to serve it with rice.

Some of you may look at this recipe and wonder if it is worth buying all the spices to make it.  The initial outlay may be a bit costly but they will last for absolutely ages.  Once you have used them you will never want to buy a jar of ready-made curry paste or sauce again!  There is just no comparison in the flavours.  The best place to buy the spices, if you can, is in an Asian supermarket.  They sell them in bags at a fraction of the price you can usually buy them for in supermarkets such as Tesco.  start by buying the small bags unless you make lots of curries.  They will not go off but the flavour will deteriorate over time.

Anyway, here is the recipe.  You can make this ahead and warm up the next day (in fact curries usually mature if you leave them in the fridge overnight).  It also freezes well.  I make enough for four then freeze half for another time.  The slideshow starts at Step 2, I forgot to take a picture of step 1.

Murgh-Saag (Chicken with Spinach)           Serves 4

  • 3tbsp/45ml groundnut or sunflower oil
  • 1tsp/5ml fennel seeds
  • 1 large onion, thinly sliced
  • 1tbsp/5ml Ginger Paste
  • 2tsp/10ml Garlic paste
  • 8oz/225g canned chopped tomatoes
  • 1tsp/5ml ground turmeric
  • 1tsp/5ml ground coriander
  • 1/2tsp/2.5ml crushed dried chillies
  • 3 chicken breasts, skinned and cut into small cubes (about 1/2 inch)
  • 3tbsp/45ml natural yogurt
  • 1/4pt/150ml hot water
  • 1tsp/5ml salt
  • 8oz/225g fresh spinach, finely sliced
  • 2tsp/10ml dried fenugreek leaves, crushed
  • 1/2tsp/2.5ml black pepper
  • 1/2 tsp/2.5ml Garam Masala
  1. Add the oil to a wok and, when hot but not smoking, add the fennel seeds.  Stir fry for 15 seconds then add the onions, reduce the heat to medium, mix well with the fennel then continue to fry for 10 minutes until the onions are soft and just starting to colour.
  2. Add the ginger and garlic pastes and stir-fry for 1 minute.  Add the tomatoes and stir-fry for 4 minutes more or until all the juice has evaporated.
  3. Add the turmeric, coriander and chillies, stir-fry for 1 minute to cook the spices then add the chicken.  Mix well and stir-fry for 3 minutes.  Add the yogurt and stir-fry for 2-3 minutes more.
  4. Pour over the water and add the salt, mix well and simmer for about 5 minutes.  Add the spinach, mix well and continue to simmer for 4-5 minutes.  Stir in the fenugreek, black pepper and garam masala.  Simmer for 2 minutes or until the sauce is thick and the chicken is cooked through.  Serve.

This slideshow requires JavaScript.