Archive | Desserts and baking RSS feed for this section

Lemon Drizzle cake

4 Oct

DSCI0165
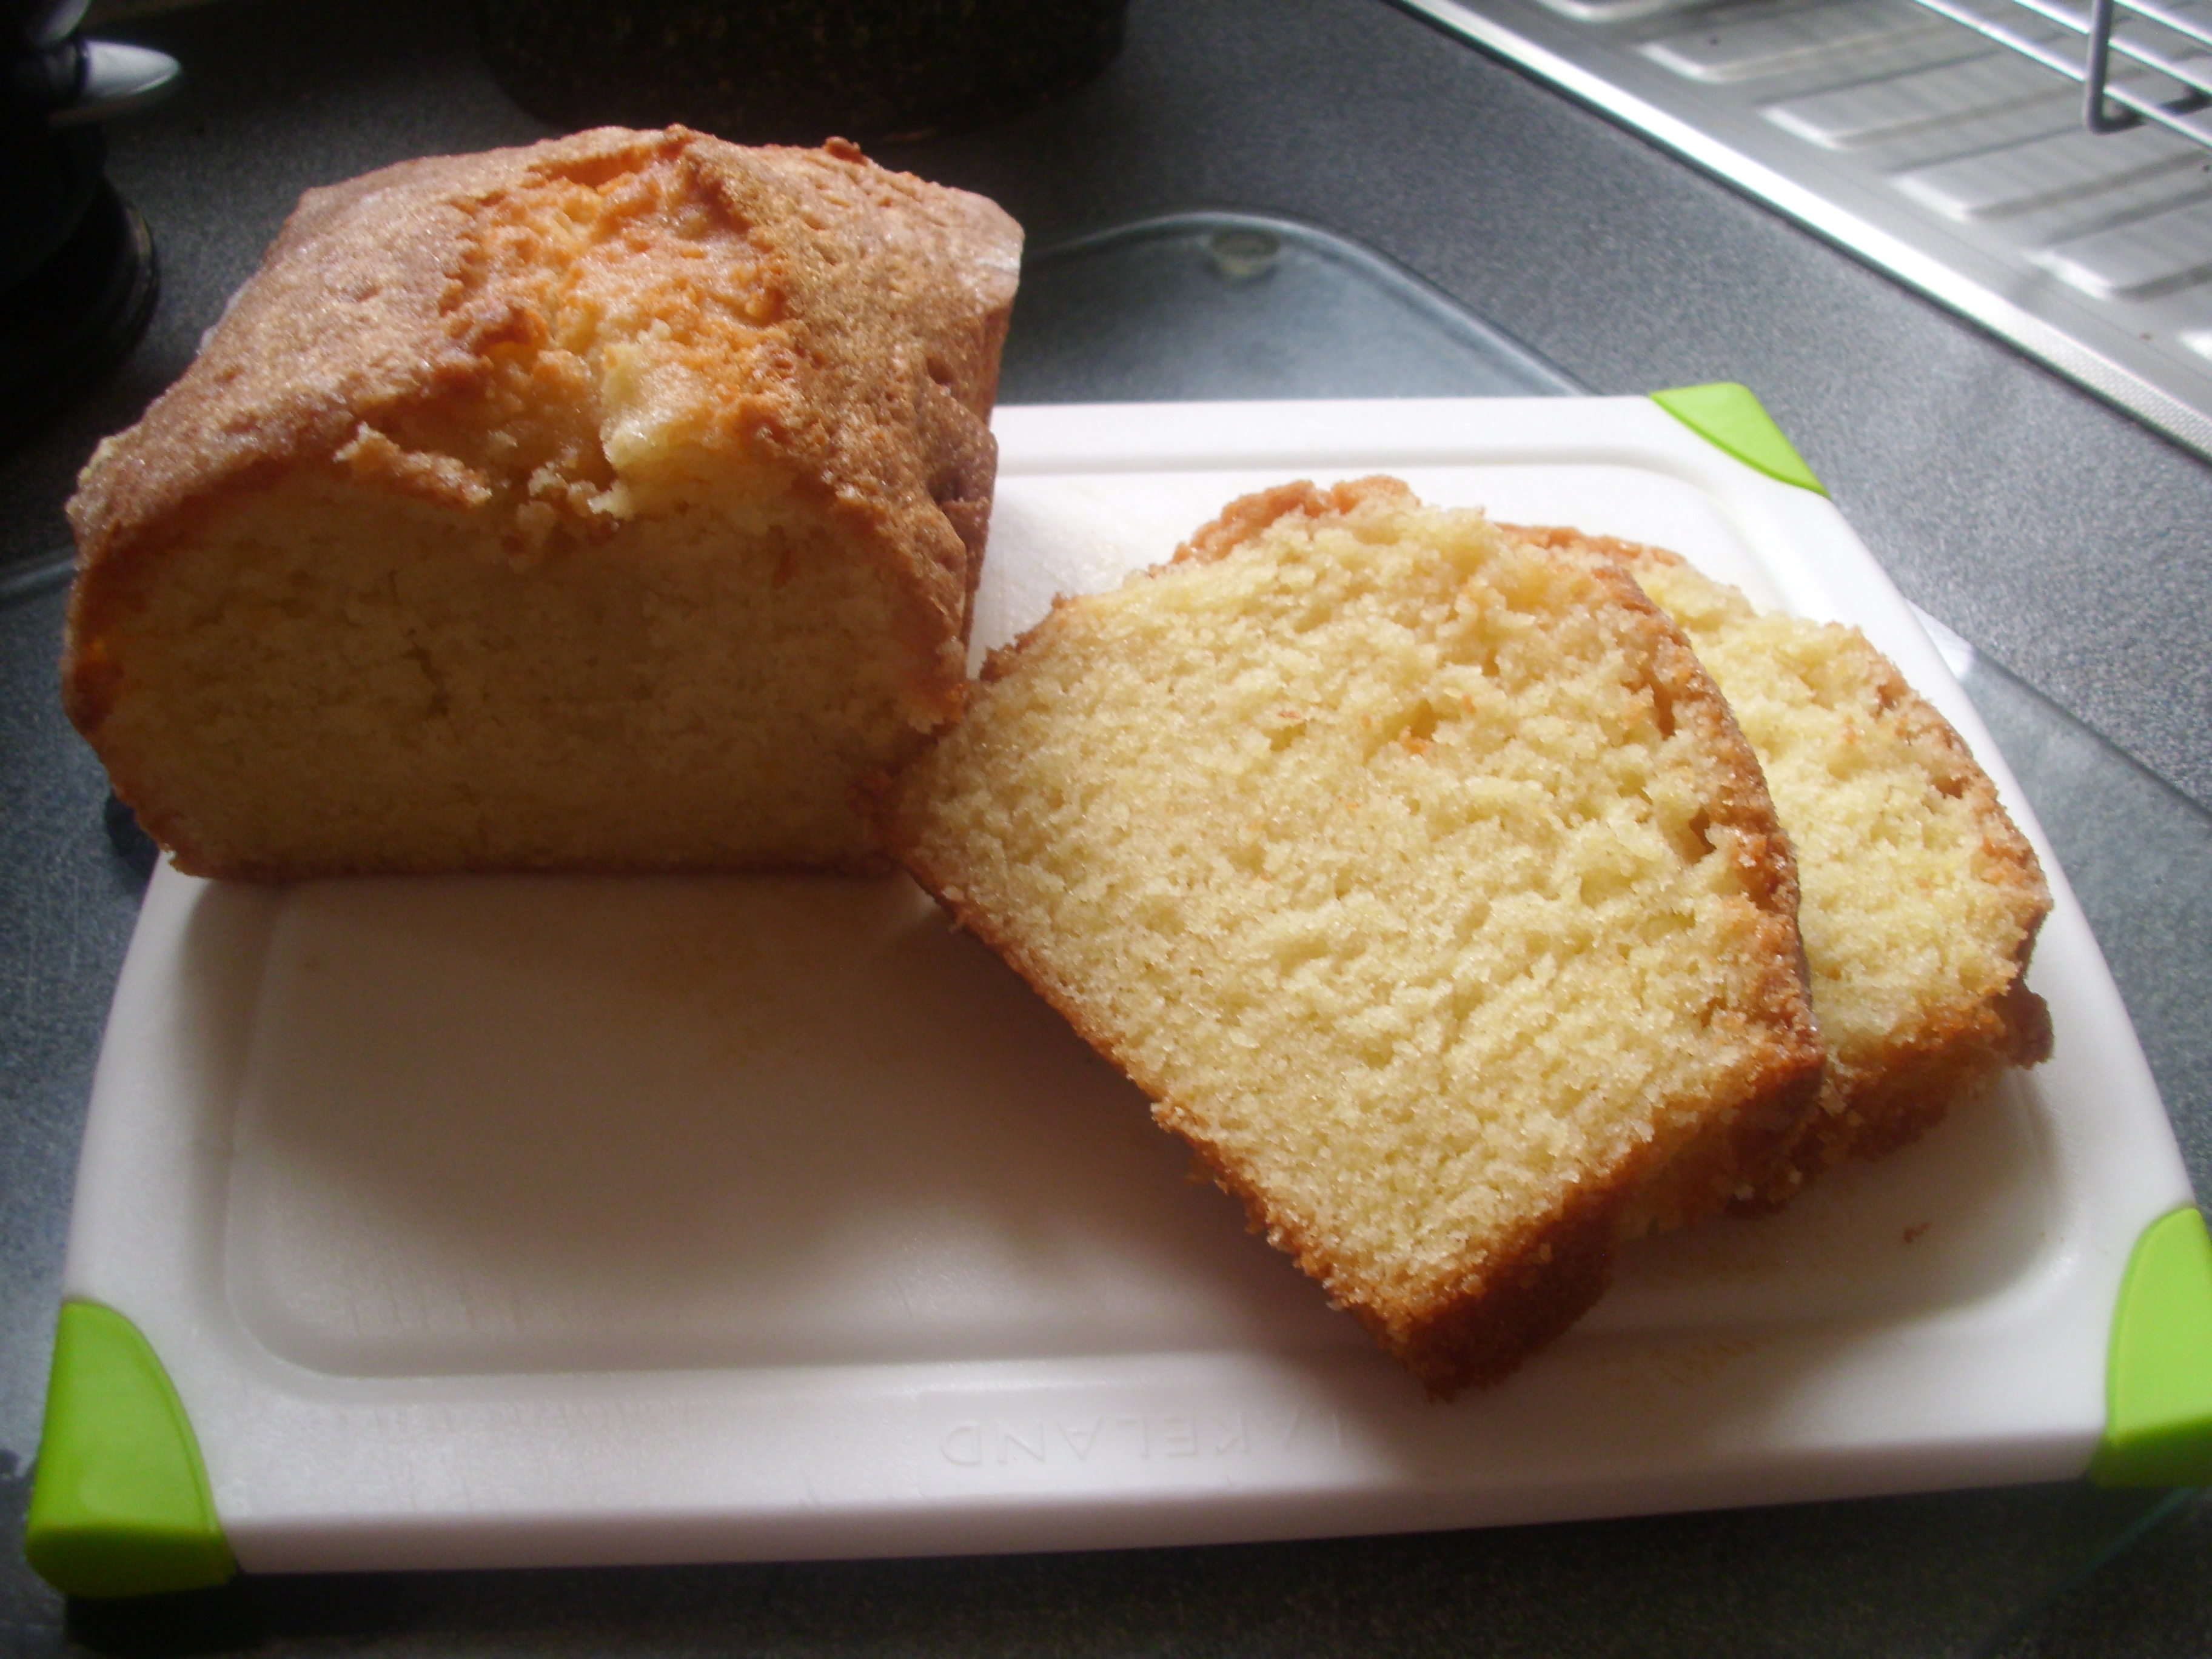
I rarely make cakes but I made this an exception as I was preparing a High Tea for friends.  The lemon drizzle gave the cake a lovely crunchy top and a delicate lemon flavour to the sponge which, on reflection, was very similar to a Madeira cake.

We only ate about a third of the cake so I have frozen the remainder and will use another time to make a pudding. I have a lovely raspberry and sherry trifle in mind or maybe just make a summer berry compote to drizzle over it and serve it with fresh cream. Lovely.

I mentioned above I was preparing High tea, but maybe this was Afternoon Tea. So what is the difference?

Afternoon tea is served around 4.00pm. When afternoon tea became fashionable in the early 19th century, thanks to the Anna, the Duchess of Bedford it was never intended to replace dinner but rather to fill in the long gap between lunch and dinner at a time when dinner was served at 8pm. Lifestyles have changed since those times and afternoon tea is now a treat, rather than a stop-gap.

High Tea means different things to different people. The origins of Afternoon Tea show clearly this was the preserve of the rich in the 19th century. For workers in the newly industrialised Britain of the time ‘tea’ had to wait until after work and be substantially more than just tea and cakes. Workers needed sustenance after a day of hard labour, so the after work meal was more often hot and filling and accompanied by a pot of good, strong tea to revive flagging spirits.

The addition of High is believed to differentiate between the Afternoon Tea served on low, comfortable, parlour chairs or relaxing in the garden and the worker’s High Tea served at the table and seated on high back dining chairs.

Today, the evening meal in working class households is still often called ‘Tea’ but as working patterns have changed yet again, many households now refer to the evening meal as supper. (About.com)

Well, here is a link to the recipe and my , not very good, slideshow.

Lemon Drizzle Cake                     Cuts into 10 slices

http://www.bbcgoodfood.com/recipes/4942/lemon-drizzle-cake

This slideshow requires JavaScript.

Advertisement

Mini Pizzas

26 Sep

imageI make bread, with some level of success, on a regular basis, but this was the first time I had tried to make Pizzas. There were two reasons I wanted to make these. Firstly, I was having the Grandchildren for a few days and it was pouring with rain so I needed something to keep do that would keep them amused.  Secondly, my three year old granddaughter was not eating very well and I thought she would eat her Pizza if she had made it herself. I was right!  We had great fun and even my husband, who says he doesn’t like pizzas, enjoyed the results and ended up eating two of them himself.

I got the recipe from a good food magazine but the idea was more local as one of our excellent restaurants, Zamanis, had held pizza making sessions for local children and they all seemed to enjoy it. I can see why.

My Granddaughters pizza stuck with the basics of tomato sauce and mozzarella whilst my Grandson was a bit more adventurous and added ham and a variety of Italian salamis.  My husband and I went the full hog and used the ham and Italian salamis as well as mushrooms, red onion, sliced peppers and olives with a separate one topped with anchovies, olives, peppers and onions.  They were all yummy.

Here is a link to their recipe on the website.

http://www.bbcgoodfood.com/recipes/mini-top-your-own-pizzas

This slideshow requires JavaScript.

American blueberry pancakes, delicious.

14 Aug


imageI love pancakes and my favourite are crepes with lemon and sugar. I remember when my Grandma used to make them for me on Pancake Day. We could have as many as we could eat but she would never make them on any other day of the year.  This is the first time I have made American pancakes and I have to say they were very easy. I made them for my Grandson who had come over from Chicago for a holiday.  I was surprised how well they turned out and they actually looked really professional.  I did use a little more oil than stated and added a knob of butter to give them a golden colour.

American and Canadian pancakes (sometimes called hotcakes, griddlecakes, or flapjacks) are usually served at breakfast, in a stack of two or three pancakes topped with real or artificial maple syrup and butter, and often served with sides such as bacon, toast, eggs or sausage. Other popular topping alternatives include jam, peanut butter, nuts, fruit, honey, powdered sugar, whipped cream, cane syrup, and molasses.

The thick batter contains eggs, flour, milk, and a raising agent such as baking powder. The batter can have ingredients such as buttermilk, blueberries, strawberries, bananas, apples, chocolate chips, cheese, or sugar added. Spices such as cinnamon, vanilla and nutmeg can also be used. Yogurt may be used to give the pancakes a relatively moist consistency. Pancakes may be ⅓ inch (1 cm) thick and about 4 inches (10 cm) in diameter.

Here is the recipe from the Good Food website.

  • 200g self-raising flour
  • 1 tsp baking powder
  • 1 egg
  • 300ml milk
  • knob butter
  • 150g pack blueberries
  • sunflower oil and/or a little butter for cooking
  • golden or maple syrup
  1. Mix together the flour, baking powder and a pinch of salt in a large bowl. Beat the egg with the milk, make a well in the centre of the dry ingredients and whisk in the milk to make a thick smooth batter. Beat in the melted butter, and gently stir in half the blueberries.
  2. Heat a teaspoon of oil or small knob of butter in a large non-stick frying pan. Drop a large tablespoonful of the batter per pancake into the pan to make pancakes about 7.5cm across. Make three or four pancakes at a time. Cook for about 3 minutes over a medium heat until small bubbles appear on the surface of each pancake, then turn and cook another 2-3 minutes until golden. Cover with kitchen paper to keep warm while you use up the rest of the batter. Serve with golden syrup and the rest of the blueberries.

This slideshow requires JavaScript.


Date and walnut loaf – lovely!

2 Aug

DSCI0115Those of you that follow my blog will know I rarely post a recipe for cakes.  However, when I am having visitors, I do like to make a cake for when they arrive so they can have some with a coffee. I made this loaf for just such an occasion. My Brother-in-law and Niece were coming for the night to break their journey on the way home from University.  I knew they would be arriving after lunch so a fruit loaf like this is perfect in case they were peckish.

The last time they called in I made Peggy’s Banana Bread (recipe on blog under favourites) so I wanted to do something different.  I was amazed at how many recipes there were for Date and Walnut cakes/loaves. Most of them needed ingredients I didn’t have in the cupboard so this is my version. It was light and tasty, even better with a bit of butter smeared on the slice. First here are a few bits of trivia on walnuts.

  • It would take 1,051,818,240 walnuts laid end to end to circle the equator. Not sure how they worked that out!
  • Walnuts are the oldest tree food known to man, dating back to 7000 B.C.
  • Early history indicates that English walnuts came from ancient Persia, where they were reserved for royalty. Thus, the walnut is often known as the ‘Persian Walnut’.  Walnuts were traded along the Silk Road route between Asia and the Middle East.  English merchant marines transported the product for trade to ports around the world and they became known as ‘English Walnuts’  even though England never grew walnuts commercially.
  • California produces two-thirds of the world’s walnuts.
  • Shelled walnuts contain about 4% water content by weight.
  • Walnuts are a good source of omega-3 fatty acids, thought to reduce risk of cancer. They also provide protein, several essential
    vitamins and minerals, and antioxidants, yet are free of trans fats and cholesterol.
  • Because walnuts resemble the brain, they were believed in medieval times to be able to cure headaches.
  • More recently, Nasa has used pulverised walnut shells as thermal insulation in the nose cones of its rockets.

Well here is the recipe.

Date and walnut loaf

  • 225g self-raising flour
  • 1/2 tsp cinnamon
  • 175g softened butter
  • 100g light brown sugar
  • 2 tbsp clear honey
  • 2 eggs, beaten
  • 1 medium ripe banana
  • 100g stoned dates
  • 50g pack walnut pieces
  1. Preheat the ove to 160C/Fan 150c/gas 3.
  2. Prepare a 2 lb loaf tin by lightly greasing the inside the lining with greaseproof paper.
  3. Tip the flour, cinnamon, butter, sugar and eggs into a food processor and whizz together for a few minutes until blended. Mash the banana and add to the processor and blend for a few seconds. Finally, blend in the honey.
  4. Chop the dates (or use scissors to snip into small pieces) and add to the cake mix with the nuts.  Mix well so they are well blended.
  5. Spoon the mix into the loaf tin and bake in the oven for 1 hour. It should feel firm when lightly pressed. Give it another 10 minutes if it is too soft.
  6. Cool for about 10 minutes before turning out onto a wire rack. Remove the paper and slice for serving.

This slideshow requires JavaScript.

Raspberry and Orange Tiramasu

21 Jul

DSCI0653I am not a lover of traditional Tiramasu, but this version is absolutely delicious.  I gave the recipe to a friend of mine recently who wanted a large pudding for guests coming for lunch.  This is a large pudding and a little goes a long way as it is quite rich. He made the pudding and all his guests were ecstatic. From what he said I think he will be making it again in the future by popular request.

The Italian translation for tiramisu is “carry me up.” Also known as Tuscan Trifle. Tradition tiramisu is a pudding-like dessert that usually consists of sponge cake or ladyfingers dipped in a liqueur, then layered with grated chocolate and rich custard. Tiramisu was originally made as a loose custard, it is only in recent years that using mascarpone cheese has come into fashion.  It was first made, according to researchers, in the 1970’s but there is a story that believes it was made much earlier than that, in fact in the 1600’s. The story goes that a dessert similar to tiramisu was created in Siena, in the northwestern Italian province of Tuscany. The occasion was a visit by Grand Duke Cosimo de’ Medici III (1642-1723), in whose honor the concoction was dubbed zuppa del duca (the “duke’s soup”). He brought the recipe back with him to Florence. In the 19th century, tiramisu became extremely popular among the English intellectuals and artists who lived in Florence. The dessert made its way to England, where its popularity grew. (Linda Stradley, What’s cooking America)

Well, here is the recipe. I didn’t have any Grand Maniere when I made this so substituted half and half brandy. It was delicious.

Raspberry and Orange Tiramasu                   Serves at least 6

  • 6 egg yolks
  • 175g/6oz caster sugar
  • 284g double cream
  • 2 x 250g tubs mascarpone
  • 2 tbsp vanilla extract
  • 100ml freshly squeezed orange juice
  • 100ml Gran Maniere (or half brandy half Quantro)
  • 24 sponge fingers
  • 350g/12 oz fresh raspberries
  1. Place a heatproof bowl over a pan of simmering water. In the bowl, whisk the egg yolks and caster sugar together until pale, creamy and doubled in volume. Remove from heat and whisk for 1 minute to cool.
  2. In another bowl beat together the cream, mascarpone and vanilla extract until combined, thick and creamy. Fold into the creamy yolks.
  3. Combine the orange juice and Gran Maniere then dip in half of the sponge fingers and arrange over the bottom of a serving dish. Pour over half the creamy mixture then top with most of the raspberries (reserve some of the best for decorating the top).  Repeat layers finishing by decorating the top with raspberries.
  4. Cover and chill for 2 hours.


This slideshow requires JavaScript.

Apple and Pear crisp, great way to use up a glut of fruit

7 Feb

DSCI0484I recently found a bag of eating apples on my doorstep from my good friend Erica.  She admitted that they had a few blemishes and to be careful in case there were any beasties inside.  I was a bit wary, so I decided to make them into a recipe that I could freeze and use another day.  I just happened to have the last eight pears in my fridge that I picked off our tree and stored until needed.  The skin was starting to wrinkle so I decided to combine the two fruits and make an apple and pear pudding.  The term ‘Crisp’ is, I think, a variation on the English ‘crumble’ except that it is much denser and turns into a lovely crisp topping when baked.  I was really pleased with the outcome and I will definitely be making this again whenever I get a glut of fruit. I am sure it would be lovely using other fruits as well, maybe blackberry and apple, plums, apple and rhubarb, peaches, berries…… Oh my, the list could go on and on.

Here is the recipe.

Apple and pear crisp                        Makes 1 large for 6 – 8 people or 3 smaller for 2 people

For the topping

  • 1 cup / 4 ounces plain flour
  • 1 cup / 8 ounces light brown sugar
  • 1 cup / 4 ounces oats
  • 6 ounces butter

For the base

  • 1/4 tsp grated nutmeg
  • 1 tsp ground cinnamon
  • 6 oz granulated sugar
  • 3 tbsp plain flour
  • 2 tbsp juice from an orange + 1 tsp zest
  • 2 tbsp fresh lemon juice + 1 tsp lemon zest
  • 1.5 pounds of apples, peeled, cored and cut into 1 inch pieces
  • 2 pounds pears, peeled, cored and cut into 1 inch pieces
  1. Preheat the oven to 190C / 170C fan / gas 5.
  2. Combine the flour, sugar and oats in a food processor. Add the butter, cut into small chunks, and process until like large breadcrumbs. Alternatively rub the butter in by hand as if making pastry.
  3. Place the fruit into a large bowl and add the orange and lemon juices. Mix to coat the fruit.
  4. Add the remaining ingredients and mix well.  Transfer to either one large shallow, ovenproof dish or smaller ones of your choice.
  5. cover with the topping, it doesn’t matter if there are little gaps.
  6. Bake for 40 to 45 minutes or until the topping is brown and the fruit is bubbling.
  7. Serve warm or cold.  if you want to freeze, cool completely, cover with cling film and foil and freeze. Defrost before serving cold or warming through in the oven.


This slideshow requires JavaScript.


Ginger shortbread – delicious

13 Dec

DSCI0437I have never made shortbread before and was a bit concerned by dough was not soft enough. I need not have worried. It was absolutely delicious. So delicious in fact that my husband would not leave it alone and ate five of the eight slices! A few days later he was telling someone he didn’t like cake. Mmmm! Selective memory I think.  Here are a few interesting facts about ginger.

  • Ginger was used in ancient times as a food preservative and to help treat digestive problems. To do this the Greeks would eat ginger wrapped in bread. Eventually ginger was added to the bread dough creating that wonderful treat many around the globe love today: gingerbread!
  • Ginger ale eventually stemmed from a ginger beer made by the English and Colonial America as a remedy for diarrhea, nausea and vomiting.
  • Ginger thrives in the tropics and warmer regions and is therefore currently grown in parts of West Africa, the West Indies, India and China with the best quality ginger coming from Jamaica where it is most abundant.
  • Root ginger is characterized by it’s strong sweet, yet woodsy smell. It is tan in color with white to creamy-yellow flesh that can be coarse yet stringy.
  • Ginger is available year-round. When selecting root ginger, choose robust firm roots with a spicy fragrance and smooth skin. It should not be cracked or withered. It can be stored tightly wrapped in a paper towel or plastic wrap (or put into a plastic bag) in the refrigerator for 2–3 weeks.
  • Ginger is popular in Asian cuisine where it is used both fresh and dried. Ginger can also be found crystallized, candied, preserved and pickled.  The powdered, dried form of ginger has a more spicy, intense flavor and is often used in baking (gingerbread, gingersnaps, ginger cookies).
  • After ginger was first introduced in Europe (approximately 800 AD) it ranked second to pepper as a spice for centuries.
  • Chinese cooks use ginger with beef successfully, whereas European chefs prefer to use it as an exotic flavouring for fresh fruit salads, or to give cream of carrot soup and extra kick.

The recipe was in a Good Food magazine and had been sent in by Jo Foster, a reader from Leigh-on-Sea.  The recipe wasn’t on their website when I looked so I have written it out below.

Ginger shortbread                                   Serves 8 – 12

  • 175g / 6 oz plain flour
  • 8 pieces crystallised ginger, finely chopped
  • Zest of 1 large lemon
  • 50g / 2oz caster sugar
  • 100g / 4 oz salted butter, softened
  1. Heat oven to 150C/130C fan/gas 2 and grease a 10 inch loose-bottomed fluted flan tin.
  2. Beat the butter until soft then beat in the sugar. Add the lemon zest and ginger and mix well.
  3. Stir in the flour and, using your hands, work it into a soft dough.  Tip it into the tin and press into an even flat layer with your fingers. Prick the surface with a fork then bake in the oven for 40 minutes until pale gold.
  4. Cut into wedges and cool completely in the tin.
  5. Remove from the tin and dust with a little caster sugar to serve.

This slideshow requires JavaScript.

Jam and almond sponge tarts – served with childhood memories.

7 May

I remember as a small child helping my Grandma make these little tarts.  I don’t know if the recipe was hers or not but I loved cutting out the pastry and carefully putting the jam in the centre.  I wasn’t allowed to spoon the sponge mix on top as it was considered too difficult but I was allowed to do the best job of all – lick out the bowl at the end!  I imagined that everyone would have a childhood memory like this but that is not so.  My husband, for one, was not given home-made cakes so this memory is, for him, an adult one.  Mind you, he licks the bowl out with just as much relish as I did as a child.

I like to think I have carried on the tradition of making cakes and cooking with my own Grandchildren.  The eldest two, Danny and Hayden, used to cook with me every week.  To start with I used to get them cutting up vegetables etc but as time went on they wanted to do the actual cooking so I was relegated to the peeling and chopping.  I think Danny used to fancy himself as another Ainsley Harriet and I dread to think what the neighbours thought when he was yodeling!  Now my youngest Grandson loves cooking with me.  We started off with jam tarts.  I would make the tarts then he would make something similar out of the left over pastry.  It usually ended up looking quite black and unattractive but we all had to try one of his tarts.  The things you do for love!  Since then he has taken over the role I had as a child and he has progressed to making a pizza and popcorn!  I am sure, when they marry, their wives will be eternally thankful that I gave them at least some culinary skills.

Here is the recipe.  I hope you enjoy them as much as we do.

Jam and almond sponge tarts        Makes about 18

  • 8 oz plain flour
  • pinch of salt
  • 2 oz lard
  • 2 oz cooking margarine or butter
  • a little cold water
  • raspberry jam

For the sponge

  • 4 oz cooking margarine
  • 4 oz caster sugar
  • 4 oz self-raising flour
  • 2 eggs, beaten
  • 1/4 tsp almond essence
  1. Whizz the plain flour and salt together in a food processor or, if making the pastry manually, sift into a bowl.  Rub in the lard and margarine or add to food processor and whizz until like fine breadcrumbs.
  2. Carefully add cold water, a teaspoon at a time and work into the mix with a knife until it makes a soft, but not wet dough. 
  3. The experts will tell you to let this rest in the fridge for 30 minutes but neither I nor my Grandma did this and we have rarely, if ever had a failure.  Lightly flour a surface and roll out the pastry until it is about the width of a pound coin.  Cut out he shapes and line a tart tin.
  4. Place 1 tsp of jam in the centre of each tart.  Don’t be tempted to be over generous as the jam will seep out of the tart during cooking.
  5. To make the sponge – whizz together the sugar and margarine in a food process until it is light and creamy (or do this with a fork if you don’t have a processor.  Add the egg and flour a little at a time, alternating, and mix in well to prevent the mix from splitting.  When all the eggs and flour have been added mix in the almond essence.
  6. Carefully spoon about a dessert spoon of sponge mix over the jam, sealing the edges well.
  7. Bake in a an oven, preheated to 190C/180C fan/gas 6, for 20 -25 minutes or until they are golden and the sponge is cooked through.  To test this pierce with a skewer and it should come out clean.
  8. Cool on a wire rack. 

    This slideshow requires JavaScript.

Peggy’s banana bread – lovely!

12 Mar

image

During our stay in Lardos, Rhodes, we ate at BoJangles a number of times.  The food was always great as was the service and the company.  On a couple of occasions Peggy, the owner, gave us a piece of her banana bread to take home with us.  In fact, on the last occasion it was a huge slab.  Both lots of bread tasted delicious but you could tell there was a difference between them.  Peggy explained that the bread is very forgiving and that you could throw anything in, it would still work.  In the first loaf of bread she had included some fresh figs that Paniotti had given her.  You could really taste the figs in the bread, they gave it a subtle sweet and aromatic flavour.  The second loaf was more traditional with the addition of dried fruit and walnuts.  We ate both with lashings of butter and had them for breakfast and as a snack with coffee.  Wonderful!

I always seem to be left with a few bananas in my fruit bowl that look as though they have seen better days.  I don’t know if others have noticed, but I am sure bananas only last half the time they used to do years ago.  I think it is because supermarkets store them in the cold and then they start to deteriorate as soon as they are taken out and put on the shelves.  Some people like bananas very ripe but I am not one of them.  I do hate waste though so I often  fish out Peggy’s recipe use them up in this bread.  Mindful of the fact that anything goes I always adapt the recipe to what I have in the cupboard but the basic cake mixture ingredients I keep the same as Peggy’s.  The loaf always turns out perfectly and, although it doesn’t usually taste the same as the ones Peggy gave us, it is always delicious. I sometimes intend to take some over to my children when I next visit but it disappears so fast There is never any left. Sorry kids!

Before I give you the recipe I though I would see if there is anything interesting to know about bananas.

The first interesting fact I found was that the banana plant is herbaceous and it is actually the largest herbaceous flowering plant.  It grows to 20+ feet so there is no wonder that people commonly mistake these as trees.  I also didn’t know that the fruit of the banana plant can be one of three colours when ripe, the common yellow, red or purple.  I’m not sure I fancy a purple banana!

They have been around for a long time and there is archaeological evidence of a banana plantation as early as 5000 BC in Papua New Guinea.  Did you also know that the banana is naturally radioactive?   This is because of their high potassium level and the small amounts of isotope potassium-40,  found in naturally occurring potassium.  Of course, they do not contain anywhere near enough to be harmful.

Nearly every part of the banana plant is used.  The fruit, flowers and the tender core of the trunk can all be eaten.  The leaves are used as plates in some cultures and, more frequently, as cooking vessels for steamed foods.  The fibres in the leaves shoots and trunk are used to make cloth and yarn and banana paper.

Well, that was certainly more interesting than I anticipated.  Here is the recipe as I made it but, as Peggy said, anything goes so feel free to experiment.

Peggy’s Banana Bread                               Makes 1 loaf

  • 8 oz Self-raising flour
  • 1/2 tsp salt
  • 4 oz butter
  • 5 oz castor sugar
  • 3 peeled bananas (about 8 oz) broken into chunks
  • 2 eggs
  • 2 oz roughly chopped walnuts
  • 4 oz seedless sultanans (or dried fruit of your choice)
  1.  Preheat the oven to 180C/160C fan/gas 4.
  2. Put the flour, salt butter, castor sugar bananas and eggs in a food processor and process until well mixed and a smooth consistency.
  3. Coat the walnuts and dried fruit in a little flour and stir into the mix.  The flour will stop the fruit and nuts sinking in the bread and ensure an even distribution.
  4. Grease a 1 kg loaf tin then line with greaseproof paper and grease again.  Pour the mixture into the tin then bake in the oven for 1.1/4 hours or until it is risen and brown and a skewer comes out clean after piercing the centre of the bread.
  5. Turn out and cool on a cooling tray before slicing.  Serve with or without butter.

    This slideshow requires JavaScript.

Olive bread, great toasted with tomatoes.

2 May

DSCI0139I can’t think of anything that smells more wonderful than bread baking in the oven.  That is of course if you forget fried onions or bacon.  When I was a child my Grandma used to bake bread every Saturday. She would make about 10 loaves that would last all week.  I don’t know how she managed to keep them so fresh as there were no preservative in them but, I could guarantee that the last loaf would taste just as perfect as the first.  She used to make balm bread as well which was a slightly sweeter dough with currents in.  When I met my husband he thought he was in seventh heaven when he first tasted it.

I have had spells of making bread over the years but it has been a long time since I last made some.  I decided to make this batch on Sunday.  We had been to Staunton Harold and I was tempted by the array of breads in the deli there.  I was going to buy some but then decided at the last minuet to go home and make my own.  I was so glad I did.  This olive bread is the best I have ever tasted.  I made a basic Italian white bread dough, halved it and used half to make two loaves of olive bread and the other half to make to white loaves.  I was thrilled at the results.  The recipe was from ‘The Bread Book’ by Linda Collister and Anthony Blake.  It was really easy to follow.  I used to leave my bread to ‘proove’ (rise to twice its size) in a warm place for one hour.  The recipes in this book call for a longer rising time in room temperature.  Much easier, especially in winter, and really effective.  The recipe in the book uses fresh yeast and gives an alternative using ‘Easy- Blend Dried yeast’. I have found it is nigh on impossible to buy fresh yeast today ( although my Grandma would use nothing else).  I suppose speed has become a sign of the times.  Anyway, the recipe below is exactly how I made it.  Kneading is an essential part of bread making.  There are lots of videos on the net to show you the technique. I have put a link below as an example.

http://www.bbc.co.uk/food/techniques/kneading

No slide show on this recipe folks as it was so easy and basically only one step prior to the kneading. The bread is best eaten within 24 hours but is fantastic toasted for 2 -3 days after that.  Try the Olive Bread toasted lightly, top with sliced ripe tomatoes, season then continue to grill until the tomatoes are warmed through and soft. Delicious!

Olive Bread (or Italian white bread)           Makes 4 loaves

  • 1.5kg (3.25 lbs) strong white bread flour.
  • 30g/1 oz salt
  • 2 sachets (14g/1/2oz) Easy-Blend Dried Yeast
  • Good pinch of sugar
  • 850-990ml/1.5-1.75pints lukewarm water
  • 140 ml / 5 fl oz extra virgin olive oil
  • 170g /6 oz stoned black olives, chopped roughly
  • extra flour for dusting
  • extra oil for greasing bowl.
  1. Mix the flour, salt, dried yeast and sugar together in a very large bowl.
  2. Add most of the water and mix together roughly.
  3. Add the olive oil and continue mixing until the dough comes together.  If necessary, gradually add the remaining water to make a soft but not sticky dough that holds its shape.
  4. Turn the dough out onto a lightly floured surface and knead as per technique above for 10 minutes, until it becomes smooth and elastic.
  5. For the white bread, cut the dough in half and return one half to a clean, oiled mixing bowl, cover with a damp tea-towel and leave at room temperature for 3.5 – 4 hours or until doubled in size.
  6. For the Olive bread take the remaining half of dough and knead in the chopped olives.  If it becomes too wet, add a little more flour.  When the olives are dispersed evenly put in a separate clean, oiled mixing bowl, cover with a damp tea-towel and leave at room temperature for 3.5 – 4 hours.
  7. When the dough has risen, take out each in turn and cut in half to make two white loaves and two Olive loaves.  For each loaf, gently pull at the sides and tuck under until you have a nice round shape to the loaf. Do not knead the dough or knock back or turn it over at this stage.
  8. Put the loaves onto floured baking trays, cover again with the damp tea-towel and leave at room temperature for 1 – 1.5 hours until almost doubled in size again.
  9. Meanwhile, preheat an oven to 230C/220C fn/Gas 8).
  10. When the dough is ready, uncover, dust lightly with flour then bake in the hot oven for 12 minutes then lower the oven temperature to 190C/180C fan/Gas 5) and bake for 25- 35 minutes longer until the loaf sounds hollow when tapped underneath.  Cool completely on a wire rack, if you can resist the temptation not to butter a slice whilst it is warm.