Archive | My favourite recipes RSS feed for this section

The best Lamb Curry I have ever made!

3 Jan

DSCI0297This is a recipe from Rick Steins India cookbook and was given to him by Mr Singh.  On the TV series of the same name he talked about Sikhs and how he had yet to meet an unpleasant Sikh and I entirely agree with him, although I am sure, by the law of nature, that there must be some out there.  All I know is that whenever I have seen or met a sikh they are always incredibly smart with well trimmed beards. They have always been very friendly and helpful.  Most male Sikhs have Singh (lion) and most female Sikhs have Kaur (princess) as their last names.  When they are baptised male Sikhs must cover their hair with a turban, but for female Sikhs this is optional. The greater Punjab region is the historical homeland of the Sikhs, although significant communities exist around the world.

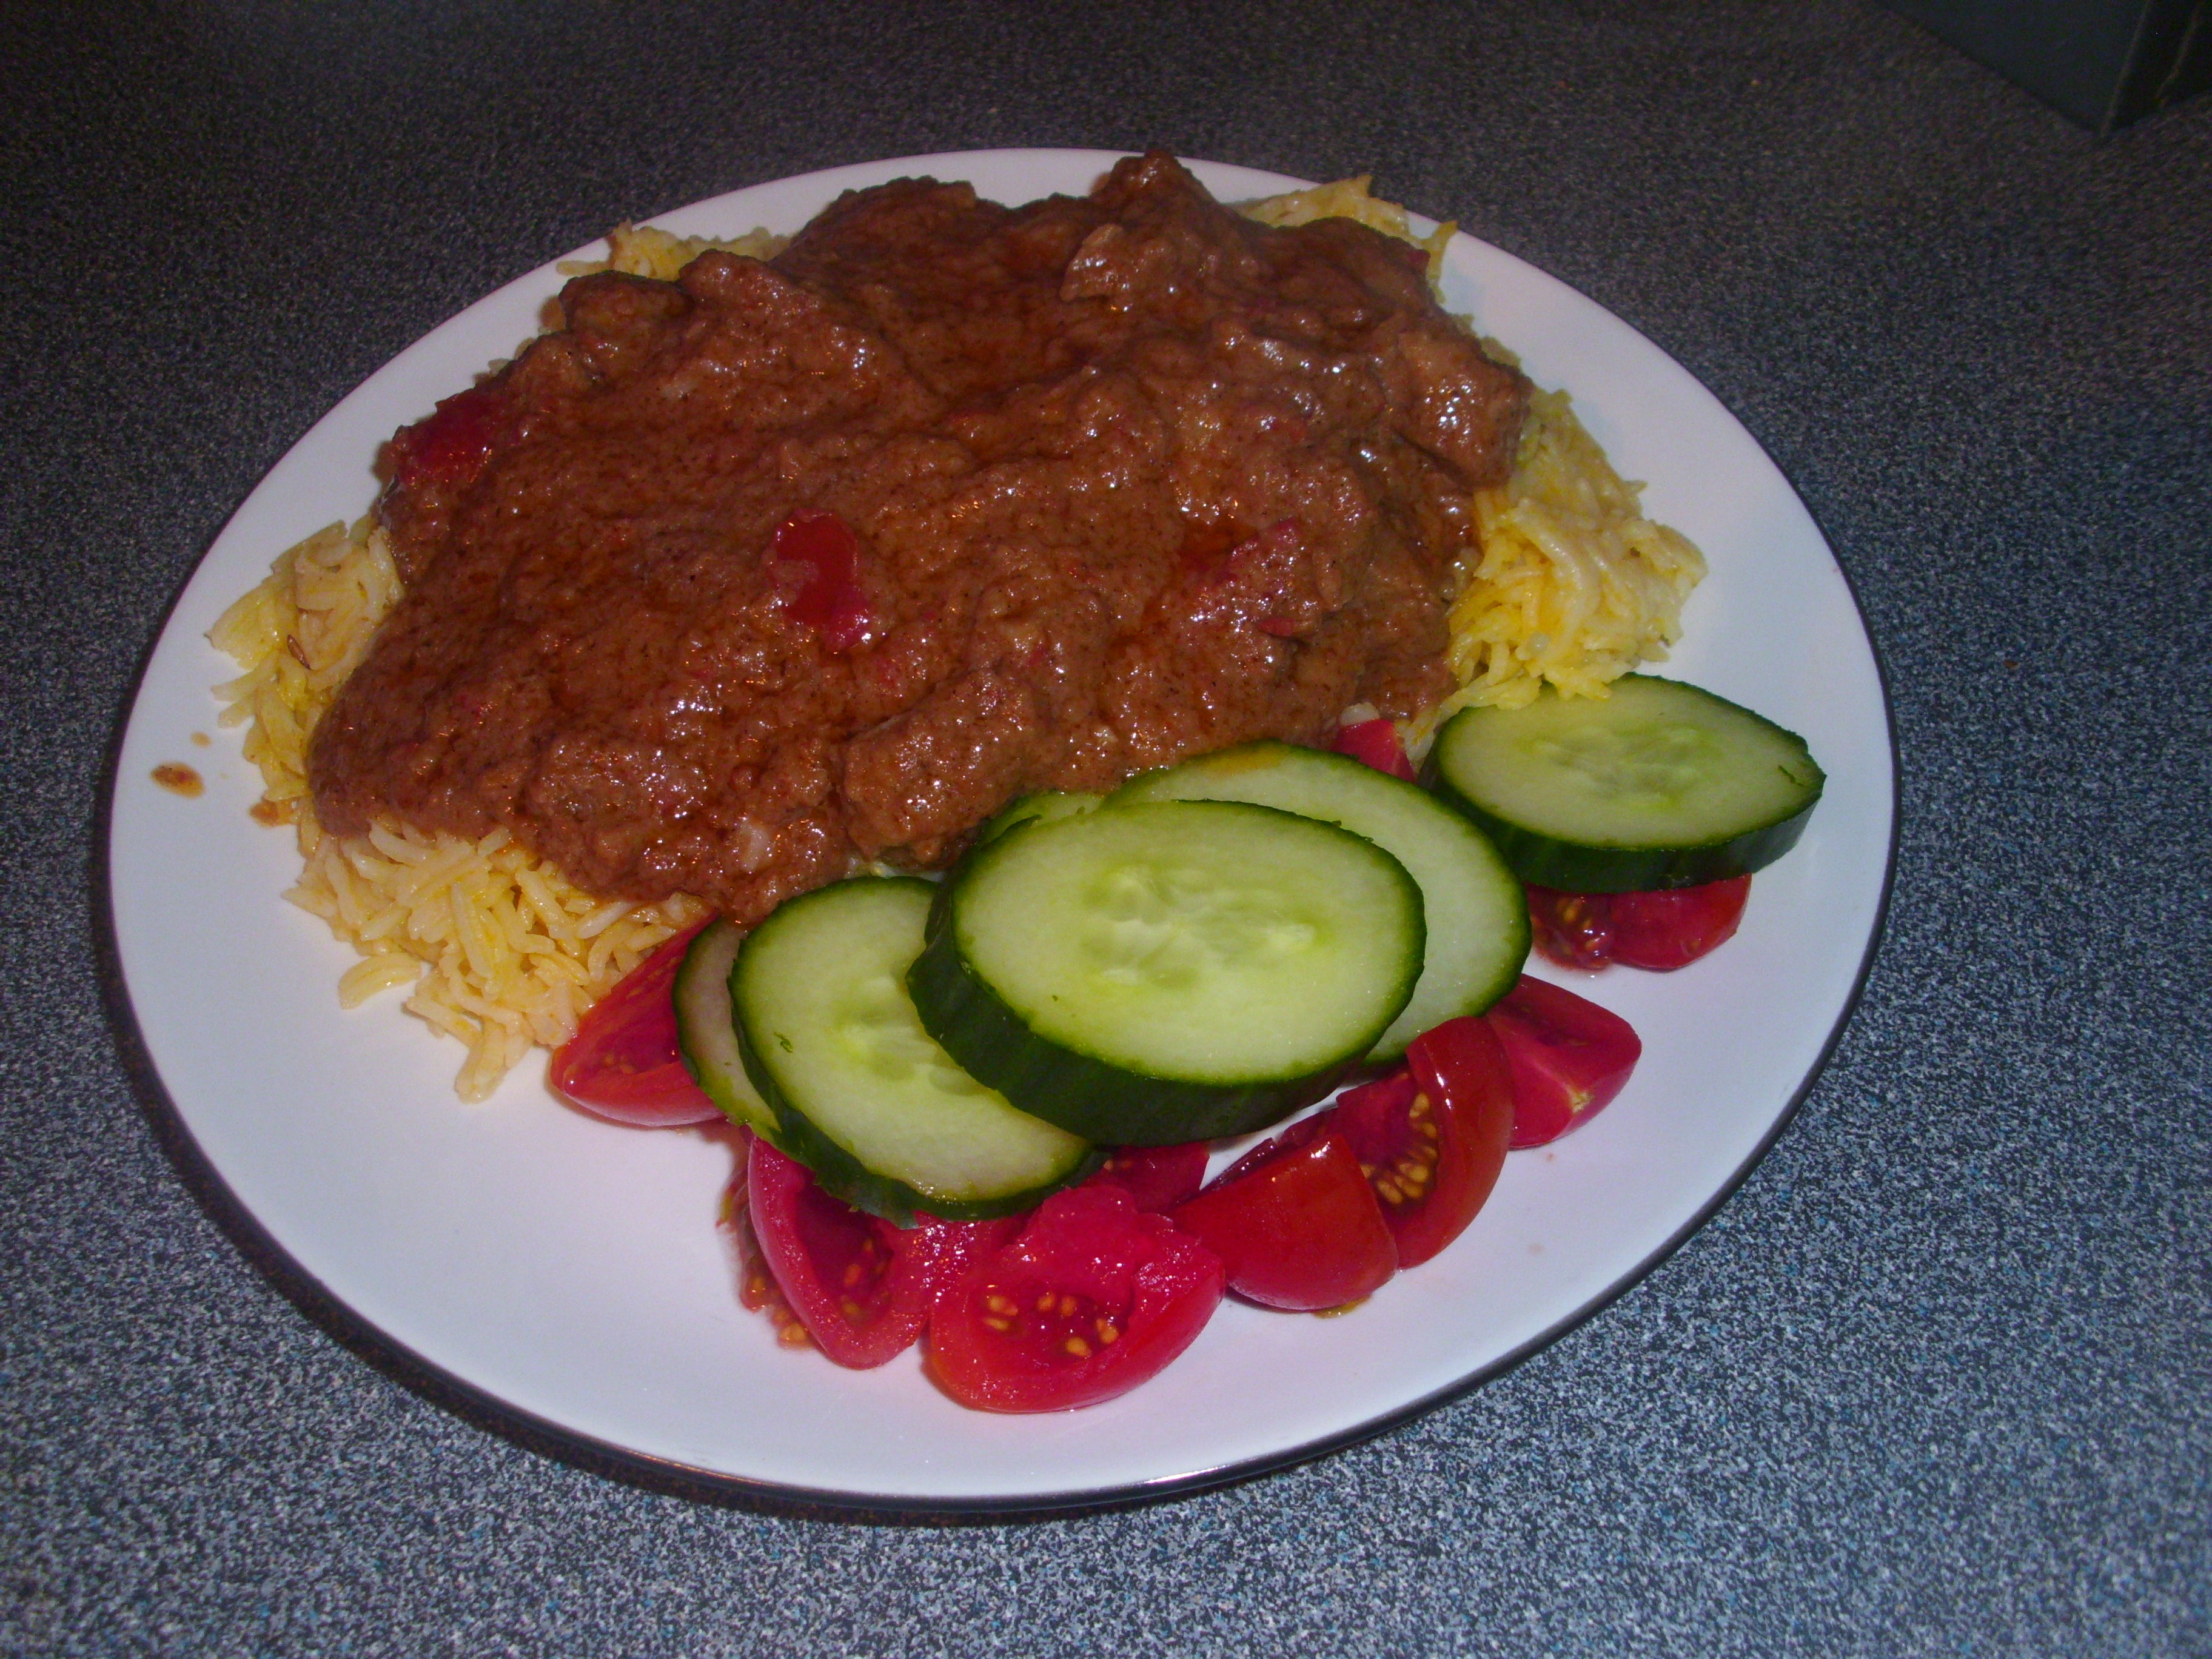
This recipe uses shoulder of lamb. In the past I have opted for leg of lamb for my curry recipe, mainly because my husband hates fatty or chewy meat.  This time I decided to go along with the shoulder option and, although I did cut out excessive fat and all sinews that I could find, I did leave in some of the fat. The result was the tenderest most succulent lamb I have ever tasted. i will definitely be using shoulder of lamb in future for any slow cooked recipes.

I have previously provided a link to this recipe on the BBC website but, as they have now removed it, here it is.

Mr Singh’s Slow-cooked lamb curry with cloves and cardamom   Serves 4 – 6

  • 8 cardamom pods
  • 4 – 6 cloves
  • 3 medium onions
  • 200g tomatoes
  • 10 cloves garlic
  • 4cm root ginger
  • 75 ml vegetable oil
  • 100 ml full fat natural yoghurt
  • 700g boneless lamb shoulder, trimmed of excess fat and cut into 4 cm pieces
  • 1 tsp salt
  • 1 tsp Garam Masala
  • 1 tsp hot chilli powder
  • 1 tbsp single cream
  1. Grind the cardamom and cloves into a powder and set aside.
  2. Using a mini processor roughly chop the onion then add a little water and process to a puree. Set aside.
  3. Rinse processor then blend tomatoes to a puree. Set aside
  4. Rinse processor the blend garlic and ginger with a little water. Set aside.
  5. Heat the oil in a heavy based pan over medium heat and gently fry the onion puree for about 15 minutes until golden.  Add the  ginger and garlic paste and continue to fry for another 3 minutes. Stir in the yoghurt then ad the meat and mix well so it is coated. Season with the salt then cook over a low – medium heat for 30 minutes until browned.  Stir in the Garam masala and chilli powder, cook for about 30 seconds then pour over enough water to barely cover the meat. Cover and simmer for 40 minutes.
  6. Stir in the cream and tomatoes then the cardamom and cloves mix. Cover the pan with foil then replace the lid and cook over the lowest heat for 40 minutes or until the lamb is tender.

This slideshow requires JavaScript.

Related articles

Cauliflower, potato and red pepper curry – who needs meat?

26 Dec

I really like vegetable curries but I get a bit fed up with the usual dishes using mainly root vegetables.  This recipe is fantastic and can be eaten either as a main for vegetarians or as a vegetable dish to be served with a meat curry and rice for a dinner party.  You can vary the vegetables to suit your own taste.  The three I have used really went well together and I threw in a few frozen peas near the end of cooking time to add a bit of colour.  If there are any vegetables left over after we have eaten this I am going to make them into pakoras by adding them to a thick batter made of gram flour and water.  We can have them for lunch tomorrow with some raita and a tomato, cucumber and onion salad.  Yum!

I am serving this tonight to accompany a chicken curry and rice to share with friends.  I remember years ago when I first cooked for friends, I was absolutely terrified.  As the years went on I realised that a stressed hostess was no good at all so I started to relax and enjoy myself.  We went through a phase of having themed dinner parties.  My Mum bought me a leather-bound menu holder for 10p at a car boot sale and I would type up the menu, using the language of origin, and put it on the table for a bit of fun.  We would scour the shops for ethnic beer and wine to accompany whatever meal I was preparing and we even went as far as sourcing typical music for the area.  Some might call this anal but we had lots of fun times while it lasted.  One of the funniest was when I did a Chinese meal for my brother and sister-in-law.  Our next door neighbour at the time was Chinese and he typed up my menu for me in Chinese with the English version underneath.  He even gave us some tea, one lot to have before the meal to improve the appetite and one for when we had eaten to aid digestion.  I remember he lent us a Chinese CD that sounded a little bit like the Goons singing Yinta Yinta.  I don’t know how we ate the food for laughing.  I suppose all this led up to me wanting to write this blog.  It isn’t because I think I am a fantastic cook but I thought it may help others who feel as terrified as I did all those years ago.  The aim is to cook simple meals that taste great and have been tried and tested, as well as provide pictures of each step to help others visualise what it should be looking like.  I’ve messed up a bit for this recipe as I forgot to take a photo of the first 2 steps.  Hopefully it will not mar the ability to replicate.

Cauliflower, potato and red pepper curry                      Serves 4

  • 100g/4 oz ghee (or unsalted butter if you can’t find any ghee)
  • 1 small cauliflower, cut into small florets
  • 450g/1lb small potatoes,  quartered or cut into 3/4 inch chunks
  • 1 red pepper, deseeded and cut into 1/2 inch squares
  • Handful frozen peas
  • 1 medium onion, finely chopped
  • 450g/1lb tomatoes, sliced thinly
  • 450 ml/3/4 pt hot water
  • salt to taste
  • pinch asafoetida
  • 2 cloves
  • 1 tsp cumin seeds
  • 1 brown cardamom
  • Chopped fresh coriander for garnish

For the paste

  • 1 medium onion, roughly chopped
  • 1 inch root ginger, roughly chopped
  • 4 cloves garlic, roughly chopped
  • 1 tsp turmeric
  • 1 tsp hot chilli powder
  • 1 tbsp coriander seeds
  • 1/2 tsp ground cinnamon
  • 1 tsp garam masala
  1. Heat 1/4 of the ghee in a large saute pan and fry the asafoetida powder for 5 seconds.  Add the cauliflower, potato and red pepper, mix well and fry for about 5 minutes over a moderate heat.  Remove and reserve.
  2. Grind the cloves and brown cardamom to a powder.  Heat the remaining ghee in the same pan and add the onion, ground cloves and cardamom and cumin seeds.  Mix well and cook over a low-moderate heat until the onions have browned.
  3. Put the onion, garlic and ginger into a small processor and chop until very fine, almost a paste.  Grind the coriander seeds and add, with the onion paste and other paste ingredients to the fried onion.  Cook for about 3 minutes.
  4. Return the vegetables plus the sliced tomatoes to the pan, mix well to coat with the onion spice mix and then fry for about 5 minutes.  Add the water and the salt and continue cooking for about 30 minutes or until the vegetables are tender but not mushy.   5 minutes before the end of the cooking time add the frozen peas.
  5. Serve hot, sprinkled with the chopped coriander.

This slideshow requires JavaScript.

Crispy pancakes – a blast from the past!

4 Sep

I can remember buying these for the kids in the 70’s.  They loved them and we would have them once a week with chips.  Really healthy I can hear you say.  You bought them in packs of four and I think the choices were chicken and mushroom or minced beef.  The recipe today is based on the principal of these pancakes but the result is nothing like them.  For a start they are twice as big and secondly the filling is rich and creamy and lots of it.  I still served them with chips although, nowadays, I go for the healthy version in my dry fryer.

This is the first time I have ever made my own savoury pancakes.  I love pancakes but tend to stick to the sweet variety and then only on Pancake Day.  My absolute favourite is a pancake sprinkled with sugar and drowned in the juice of a lemon. Mmmmm!  When my son’s family came to visit us in Fuerteventura in February  I made loads of pancakes on Pancake Day.  Some simple with lemon juice and some elaborate with marinated strawberries and fresh cream, but all delicious.  Clean plates all round!

Pancake Day ( also known as Shrove Tuesday) is the last day before the period which Christians call Lent. It is traditional on this day to eat pancakes.  Lent is a time of abstinence, of giving things up. So Shrove Tuesday is the last chance to indulge yourself, and to use up the foods that aren’t allowed in Lent. Pancakes are eaten on this day because they contain fat, butter and eggs which were forbidden during Lent.  Other religions and Countries observe Lent in a similar way.  For example, in Greece they abstain from eating meat for the whole of Lent then celebrate Easter by spit roast a whole goat. 

The name Shrove comes from the old word “shrive” which means to confess. On Shrove Tuesday, in the Middle Ages, people used to confess their sins so that they were forgiven before the season of Lent began.

Every Pancake Day, windows in Atherstone are boarded up and shoppers dive for cover.  Why? Its time for the famous ball game! It’s possibly the most extroadinary sight you will ever see in Warwickshire – perhaps even through the Midlands and beyond. Hundreds of people gathering to knock seven bells out of one another in an attempt to grab hold of a heavy leather ball – and run the risk of being dismembered in the process.  

The Atherstone Ball Game is one of the oldest traditions in the country – the game has taken place every single Shrove Tuesday for 805 years.  Not even wars could stop it going ahead!  Although the current recession may be it’s downfall.  No one knows exactly where the tradition comes from – whether it came from border disputes or as a challenge between young men from different areas – but it remains and is only one of two such events that survive today, the other being in Ashbourne, Derbyshire. (As reported by the BBC).   

The recipe is from the March Edition of Delicious.  Here is a link to it on their website.  I made the pancakes by using 125g plain flour, an egg, pinch of salt and 250 ml of milk, beaten together to make a smooth mix.  I layered the left over pancakes and the filling in an ovenproof dish, finishing with a pancake and then scattered fresh breadcrumbs and grated cheese on top before freezing.  I’ll have that with salad on another day, thawed then reheated for 25 minutes in a moderate oven.  Can’t wait!

http://www.deliciousmagazine.co.uk/recipes/creamy-chicken-and-mushroom-crispy-pancakes


This slideshow requires JavaScript.


Prawn Saganaki – a wonderful Greek dish

7 Aug

DSCI0112I remember the first time I had Prawn Saganaki. It was on the beautiful island of Aegina, cooked by the sister of a dear friend for their Fathers 90th birthday party. I had to move the dish away from me or I would have eaten the lot.  I have looked many times for the recipe but have struggled to find it.  There are some on the internet but, somehow, the ingredients don’t seem to marry with the taste I remembered.  Recently we went for a week in Stalis, Crete.  I lost count of how many times I ate Prawn Saganaki or Mussel Saganaki while I was there. The most wonderful of all was served in an ouzeri called Tsourlis, almost next door to the apartments where we stayed.  They made their Mussel Saganaki with fresh mussels and it was absolutely to die for.

I had an idea in my head of the ingredients and was delighted when I cross-referenced this with the recipe in my very old Greek cookery book written by Rena Salaman.  Rena is a guru of traditional Greek cooking and, although this little paperback does not include pictures, the way she writes about her food and the places she remembers eating them is so vivid you feel you can almost taste the dishes she is describing.  She does not call her dish Prawn Saganaki but ‘Yarithes Yiouvetsaki’.  The dish is exactly the same as the ones I have tasted – prawns baked in a fresh tomato and feta cheese sauce.  Wonderful on its own  with chunks of fresh bread to mop up the sauce. Rena’s book is simply called ‘Greek Food’. It was published in 1983, not sure if there are newer publications. The ISBN IS 0-00-636467-5. If you want to read about wonderful places in Greek and maybe relive some memories, or simply want to make good Greek food, then this book is a must.

Saganaki (Greek σαγανάκι) refers to various Greek dishes prepared in a small frying pan, itself called a saganaki, the best-known being an appetizer of fried cheese.

Here is the recipe, slightly modified

King Prawn Saganaki                                    Serves 2 as a main, 4 as a starter

  • 200g raw king prawns
  • 4 tbsp olive oil
  • 1 onion, thinly sliced
  • 1 tsp dried oregano
  • 400g fresh ripe tomatoes, skinned and sliced
  • 100ml dry white wine
  • 2 tbsp chopped parsley
  • Salt and black pepper
  • 75g feta cheese
  1. Preheat an oven to 180C/160C fan/gas 4
  2. Heat the oil in a frying pan then add the onions and fry over a lo-medium heat for about 10 minutes or until the onions are soft but not coloured.
  3. Add the oregano, wine and tomatoes then continue cooking for 5 minutes until the tomatoes start to break down. Season, add the parsley then crumble in the feta cheese. Mix well, bring to the boil then remove from the heat.
  4. In the meantime bring a small pan of water to the boil then add the prawns and cook for 2 minutes until turned pink. Be careful not to overcook as they will go hard.
  5. Put the prawns in an ovenproof dish and cover with the sauce.  Cook in the oven for 15 minutes.
  6. Serve with chunks of crusty fresh bread.

This slideshow requires JavaScript.

Potato, asparagus and mint salad – absolutely divine!

3 Aug

 This salad has to be my number one favourite.  I could eat it alone but it excels as an accompaniment to any meat or fish dish.  We served it with the barbecued poussins and it was absolutely delicious.  The mint flavour really lifts it and, of course, it contains one of my favourite foods, asparagus.

Did you know that asparagus can grow 10 inches in 24 hours?  It comes in three colours, green, white and purple.  The green asparagus is readily available and is possibly the most popular.  I have seen the white asparagus in Spain, usually limp and soggy out of a jar or on a salad.  I, personally, think there is no taste to this and it is repulsive.  I have never seen the purple variety. 

Asparagus is loaded with vitamins and minerals.  Potassium, crucial for heart function and a key player in muscle contraction.  Vitamin K, essential for blood clotting.  Folate, prevents anaemia.  It is a strong diuretic and has been found useful in treating swelling associated with rheumatism and arthritis as well as bloating in PMS related water retention.

The fact that I was most interested in, however, is why does it make your pee smell?  Apparently you must have the right gene to be able to smell it but for those who have, which includes me and my husband, I can tell you it is a really strong, weird smell.  I first noticed it when we started eating asparagus while we lived in California.  I thought there was something wrong with the drains to our apartment!!!  The smell is caused by sulphur-containing compounds that are created when asparagus is digested.  They don’t have any harmful effect on our health so , no worries, just don’t pee in a public lavatory after you have eaten asparagus.  The smell is noticeable after only 15 minutes of eating it!

We were introduced to asparagus by Chinese Eddie.  He was a fantastic old gent (over 90 yrs old) who lived in our complex.  In his youth he used to work in the asparagus fields around Woodland Hills.  His top tips were always buy asparagus with the thickest stalks as these have matured and have a much better flavour. Hold the tip and the end and bend the asparagus, it will break at the natural point so you can discard the woody bit, and don’t over cook, it needs only 3-4 minutes in boiling salted water before it is ready.

Here is the recipe.  I hope you try it, you are in for a treat.

Potato, asparagus and mint salad                                 Serve 4

  • 500g new potatoes
  • 2 packs asparagus tips
  • 1 small red onion, peeled and thinly sliced
  • 3 tbsp white wine vinegar
  • 1 tbsp olive oil
  • handful fresh mint, leaves picked and chopped
  1. Peel the potatoes and cut into bite sized pieces.  Put in a pan of boiling, lightly salted water.  Bring back to the boil then simmer for 10 minutes or until just tender.  Remove with a slotted spoon to a plate and cool.  Reserve the cooking liquid.
  2. In the meantime, put the onion in a bowl and add the vinegar and oil.  Mix well and leave to marinade.
  3. Bring the pan of water back to the boil then add the asparagus.  Bring back to the boil again the simmer for 3 minutes or until the asparagus is just tender.  Drain and run under cold water to stop the cooking process.  Dry on kitchen paper.
  4. Add the potatoes, asparagus and chopped mint to the onion.  Toss lightly so all the vegetables are coated in the dressing and serve.

    This slideshow requires JavaScript.

Fish curry – light and spicy, perfect for Summer.

17 Jul

 I am not a lover of fish in curry, except for prawns that is.  My husband feels the same way, unusual as he loves curry of all kinds.  When I first saw this recipe I was struck by the fact that I loved all the ingredients.  It promised it was not too spicy and, as it was also low in fat, I decided to give it a try.  Thank God I did as this has to be one of the most delicious curry I have ever tasted.

The sauce contains coconut milk so I thought I would try to find some trivia about coconuts.  (ref: www.foodreference.com)

  • Near Port Royal, Jamaica a stone monument on the Palisadoes commemorates the planting of the first coconut tree on the island on March 4, 1869 by John Norton, the Superintendent of the General Penitentiary.  Over the next 20 years, 20,000 coconut trees had been planted. Disease eventually destroyed all of the Palisadoes coconut trees.
  • Falling coconuts kill 150 people every year – 10 times the number of people killed by sharks.
  • Coconut oil was the world’s leading vegetable oil until soybean oil took over in the 1960s.
  • There are more than 20 billion coconuts produced each year.
  • Coconut juice or coconut water is the liquid inside a coconut. Coconut milk is produced by steeping grated coconut in hot water then straining; coconut cream is coconut milk cooked down until it thickens, or grated coconut steeped in hot milk instead of water.

Here is the recipe.  Serve with basmati rice and a tomato and cucumber salad on the side.

Fish curry                                                Serves 2 (easily doubled)

  • 1 tbsp vegetable oil
  • 1 onion, very thinly sliced
  • 4 vine tomatoes, roughly chopped
  • 2 cloves garlic, peeled
  • 1 inch piece of root ginger, peeled and roughly chopped
  • 1 – 1.5 tbsp madras curry paste (depending on how hot you want it)
  • 100 ml coconut milk
  • handful of coriander leaves, finely chopped
  • 300g cod, skinned and cut into large pieces
  • 2 tbsp pl flour
  1. Heat half the oil in a pan and cook the onions with a pinch of salt over a medium heat until soft and just starting to change colour.
  2. Put the tomatoes, garlic and ginger in a food processor and whizz until smooth.
  3. Add the curry paste to the onions and fry for a couple of minutes.  Stir in the tomato mixture and simmer for 10 minutes or until the sauce has thickened.  Add the coconut milk and coriander.
  4. Dust the fish with the flour, shaking off excess and season.  Heat the remaining oil in a non-stick pan and fry the fish over a high heat for 1 minute on each side so they are light brown.  Carefully transfer the fish to the tomato sauce and cook for about 5 minutes or until the fish is cooked through (will depend on thickness of fillets).  Serve immediately.

    This slideshow requires JavaScript.


Pork ribs – meltingly tender!

9 Jul

My husband said these were the best spare ribs he has ever tasted.  You may not know it, but that is a huge compliment as he has had some fantastic spare ribs in his time.  The ones we had in America when we lived there were incredible and the ones swerved in Fado Rock, Fuerteventura were almost as good, but the best we have eaten out have to be at Roulas Restaurant in Lardos, Rhodes.  I think I agree with him though, these were better than any of those.  The meat just fell off the bone and the flavour was incredible.

The recipe was adapted from one of John Torode’s and it introduced me, for the first time, to Chipotle Tabasco.  I thank him for that as it is a wonderful discovery, a really smoky chilli flavour.  Fantastic!

Chipotles impart a relatively mild but earthy spiciness to many dishes in Mexican cuisine. The chiles are used to make various salsa. Chipotle can be ground and combined with other spices to make a meat marinade called adobo.

Most chipotle chiles are produced in the northern Mexican state of Chihuahua. This variety of chipotle is known as a morita (Spanish for small [mulberry]). In central and southern Mexico, chipotle chiles are known as chile meco, chile ahumado, or típico. Whereas moritas from Chihuahua are purple in color, chile meco is tan/grey in color and has the general appearance of a cigar butt. Most chipotle chiles found in the United States are of the morita variety. Almost all of the chipotle meco is consumed in Mexico.

Chipotles are purchased in various forms, including chipotle powder, chipotle pods, chipotles en adobo in a can, concentrated chipotle base and wet chipotle meat marinade.

Chipotles have heat, but also a distinctive smoky flavor. The flesh is thick and so the chile is best if used in a slow-cooked dish rather than raw. Add whole chipotles to a soup, stew or in the braising liquid for meats. Chipotles are an accompaniment to beans or lentils.

Well, here is the recipe.  It is easy and delicious.  I hope you give it a go.  I could not find the original recipe on the internet so here is how I made them.

Pork ribs                                                      Serves 4

  • 2 lbs of spare ribs, either in a rack or separate
  • 1 tbsp mustard powder
  • 1 tbsp mild chilli powder
  • 1 tbsp tomato ketchup with chilli
  • 1 tbsp soft brown sugar
  • 3 tbsp chipotle tabasco
  • 1 tbsp cider vinegar
  • 4 tbsp clear honey
  • 2 tbsp tomato ketchup
  1. Preheat the oven to 190C/170C fan/gas 5.
  2. Mix together the mustard, chilli powder, tomato and chilli ketchup and the sugar.  Rub the paste into the meaty parts of the ribs then lay the ribs in a singles layer in a shallow baking tray.  Pour 125ml water into the bottom of the baking tray then cover the whole thing with foil.  Bake in the oven for 1 hour 30 minutes or until the meat is really tender.  Remove from the oven and pour off any liquid.
  3. Turn up the oven to 110C/200C fan/Gas 7.  Combine the chipotle tabasco, cider vinegar, honey and tomato ketchup in a bowl.  Brush all over the meat and return to the oven for a further 10 minutes.  Remove and serve immediately.

    This slideshow requires JavaScript.

Braised Lamb Shanks

30 May

DSCI0062My husband is a cowboy fanatic. so, when we were living in Woodland Hills, California, and found a cowboy restaurant, he was ecstatic.  The Reata Grill is a celebration of the Wild West and the cultural diversity it gave to America.  I am surprised my husband managed to eat anything as he wandered around the restaurant looking at legendary artwork, antique saddles and authentic artefacts that make this a cowboy lovers heaven.  Of course, the food carried on the theme with umpteen choices of authentic and trendy cowboy recipes.  The Braised Lamb Shanks is my firm favourite and I have yet to serve it to friends or family where they have not asked me for the recipe.  I am sharing it with you today, slightly modified to suit my tastes,  but, if you want more of the same, then buy the restaurants cookbook ‘A Cowboy in the Kitchen’ (ISBN 1-58008-004-9). I am sure you will not be disappointed.

I can remember, not so long ago,  when lamb shanks were about a £1 each and the butchers struggled to get rid of them.  With the advent of celebrity cooks, most of whom have their own prefered methods of cooking lamb shanks, the price has gone up significantly.  Today you can expect to pay at least £3 per shank but, when you eat them and the meat falls of the bone and melts in your mouth, it is all worth it.

I served my lamb shanks with roasted root vegetables and Garlic mashed potato.  A match made in heaven.  If you want the recipe for the garlic mash just let me know.  These are quick and easy to prepare so I hope you give them a try.  Yeaaaah Haaaaa!

Braised Lamb Shanks                             Serves 4

  • 1 tbsp vegetable oil
  • 4 lamb shanks
  • Salt and black pepper
  • 1 onion, chopped
  • 5 cloves garlic, coarsely chopped
  • 2 tbsp Sweet Chilli Sauce
  • 400 ml red wine
  • 750 ml good beef stock
  • 2 sticks cinnamon
  • 2 sprigs rosemary
  1. Heat the oven to 150C/140C fan/gas 2.
  2. In a large Hob to oven pan (with lid) heat the oil over a medium-high heat.  Season the shanks and brown on all sides
  3. Remove the shanks and add the onion to the pan.  Fry for about 5 minutes until it is starting to soften.  Add the garlic and cook for 1 minute more.  Add the chilli sauce, cook for 2 minutes then add the red wine and beef stock.  Bring to the boil then return the shanks to the pan.  Cover and bake in the oven for 3 – 4 hours, or until the meat is very tender.
  4. Remove the shanks to a warm serving plate.  Strain the sauce, which by now should be well reduced, and serve separately.

This slideshow requires JavaScript.

Olive bread, great toasted with tomatoes.

2 May

DSCI0139I can’t think of anything that smells more wonderful than bread baking in the oven.  That is of course if you forget fried onions or bacon.  When I was a child my Grandma used to bake bread every Saturday. She would make about 10 loaves that would last all week.  I don’t know how she managed to keep them so fresh as there were no preservative in them but, I could guarantee that the last loaf would taste just as perfect as the first.  She used to make balm bread as well which was a slightly sweeter dough with currents in.  When I met my husband he thought he was in seventh heaven when he first tasted it.

I have had spells of making bread over the years but it has been a long time since I last made some.  I decided to make this batch on Sunday.  We had been to Staunton Harold and I was tempted by the array of breads in the deli there.  I was going to buy some but then decided at the last minuet to go home and make my own.  I was so glad I did.  This olive bread is the best I have ever tasted.  I made a basic Italian white bread dough, halved it and used half to make two loaves of olive bread and the other half to make to white loaves.  I was thrilled at the results.  The recipe was from ‘The Bread Book’ by Linda Collister and Anthony Blake.  It was really easy to follow.  I used to leave my bread to ‘proove’ (rise to twice its size) in a warm place for one hour.  The recipes in this book call for a longer rising time in room temperature.  Much easier, especially in winter, and really effective.  The recipe in the book uses fresh yeast and gives an alternative using ‘Easy- Blend Dried yeast’. I have found it is nigh on impossible to buy fresh yeast today ( although my Grandma would use nothing else).  I suppose speed has become a sign of the times.  Anyway, the recipe below is exactly how I made it.  Kneading is an essential part of bread making.  There are lots of videos on the net to show you the technique. I have put a link below as an example.

http://www.bbc.co.uk/food/techniques/kneading

No slide show on this recipe folks as it was so easy and basically only one step prior to the kneading. The bread is best eaten within 24 hours but is fantastic toasted for 2 -3 days after that.  Try the Olive Bread toasted lightly, top with sliced ripe tomatoes, season then continue to grill until the tomatoes are warmed through and soft. Delicious!

Olive Bread (or Italian white bread)           Makes 4 loaves

  • 1.5kg (3.25 lbs) strong white bread flour.
  • 30g/1 oz salt
  • 2 sachets (14g/1/2oz) Easy-Blend Dried Yeast
  • Good pinch of sugar
  • 850-990ml/1.5-1.75pints lukewarm water
  • 140 ml / 5 fl oz extra virgin olive oil
  • 170g /6 oz stoned black olives, chopped roughly
  • extra flour for dusting
  • extra oil for greasing bowl.
  1. Mix the flour, salt, dried yeast and sugar together in a very large bowl.
  2. Add most of the water and mix together roughly.
  3. Add the olive oil and continue mixing until the dough comes together.  If necessary, gradually add the remaining water to make a soft but not sticky dough that holds its shape.
  4. Turn the dough out onto a lightly floured surface and knead as per technique above for 10 minutes, until it becomes smooth and elastic.
  5. For the white bread, cut the dough in half and return one half to a clean, oiled mixing bowl, cover with a damp tea-towel and leave at room temperature for 3.5 – 4 hours or until doubled in size.
  6. For the Olive bread take the remaining half of dough and knead in the chopped olives.  If it becomes too wet, add a little more flour.  When the olives are dispersed evenly put in a separate clean, oiled mixing bowl, cover with a damp tea-towel and leave at room temperature for 3.5 – 4 hours.
  7. When the dough has risen, take out each in turn and cut in half to make two white loaves and two Olive loaves.  For each loaf, gently pull at the sides and tuck under until you have a nice round shape to the loaf. Do not knead the dough or knock back or turn it over at this stage.
  8. Put the loaves onto floured baking trays, cover again with the damp tea-towel and leave at room temperature for 1 – 1.5 hours until almost doubled in size again.
  9. Meanwhile, preheat an oven to 230C/220C fn/Gas 8).
  10. When the dough is ready, uncover, dust lightly with flour then bake in the hot oven for 12 minutes then lower the oven temperature to 190C/180C fan/Gas 5) and bake for 25- 35 minutes longer until the loaf sounds hollow when tapped underneath.  Cool completely on a wire rack, if you can resist the temptation not to butter a slice whilst it is warm.

Curry night! Murgh-Saag (Chicken with Spinach) tonight.

16 Apr

There are some people who have never tried spinach and think they hate it.  I would really encourage you to try this dish.  It may just change your mind about spinach for ever!  The flavours in this curry are absolutely stunning.  I can honestly say it is the best chicken and spinach curry I have ever tasted and I think I am a bit of an expert on such things, as I always choose Chicken Saagwala when we eat out!

Murgh-Saag is a Punjabi dish, originating from the Punjab region of northwest India and east Pakistan.  Saag dishes are usually spinach based when bought in the UK.  Elsewhere they can be made from mustard leaves.  Traditionally Saag dishes are served with Indian breads such as Roti or naan, although some areas prefer to serve it with rice.

Some of you may look at this recipe and wonder if it is worth buying all the spices to make it.  The initial outlay may be a bit costly but they will last for absolutely ages.  Once you have used them you will never want to buy a jar of ready-made curry paste or sauce again!  There is just no comparison in the flavours.  The best place to buy the spices, if you can, is in an Asian supermarket.  They sell them in bags at a fraction of the price you can usually buy them for in supermarkets such as Tesco.  start by buying the small bags unless you make lots of curries.  They will not go off but the flavour will deteriorate over time.

Anyway, here is the recipe.  You can make this ahead and warm up the next day (in fact curries usually mature if you leave them in the fridge overnight).  It also freezes well.  I make enough for four then freeze half for another time.  The slideshow starts at Step 2, I forgot to take a picture of step 1.

Murgh-Saag (Chicken with Spinach)           Serves 4

  • 3tbsp/45ml groundnut or sunflower oil
  • 1tsp/5ml fennel seeds
  • 1 large onion, thinly sliced
  • 1tbsp/5ml Ginger Paste
  • 2tsp/10ml Garlic paste
  • 8oz/225g canned chopped tomatoes
  • 1tsp/5ml ground turmeric
  • 1tsp/5ml ground coriander
  • 1/2tsp/2.5ml crushed dried chillies
  • 3 chicken breasts, skinned and cut into small cubes (about 1/2 inch)
  • 3tbsp/45ml natural yogurt
  • 1/4pt/150ml hot water
  • 1tsp/5ml salt
  • 8oz/225g fresh spinach, finely sliced
  • 2tsp/10ml dried fenugreek leaves, crushed
  • 1/2tsp/2.5ml black pepper
  • 1/2 tsp/2.5ml Garam Masala
  1. Add the oil to a wok and, when hot but not smoking, add the fennel seeds.  Stir fry for 15 seconds then add the onions, reduce the heat to medium, mix well with the fennel then continue to fry for 10 minutes until the onions are soft and just starting to colour.
  2. Add the ginger and garlic pastes and stir-fry for 1 minute.  Add the tomatoes and stir-fry for 4 minutes more or until all the juice has evaporated.
  3. Add the turmeric, coriander and chillies, stir-fry for 1 minute to cook the spices then add the chicken.  Mix well and stir-fry for 3 minutes.  Add the yogurt and stir-fry for 2-3 minutes more.
  4. Pour over the water and add the salt, mix well and simmer for about 5 minutes.  Add the spinach, mix well and continue to simmer for 4-5 minutes.  Stir in the fenugreek, black pepper and garam masala.  Simmer for 2 minutes or until the sauce is thick and the chicken is cooked through.  Serve.

This slideshow requires JavaScript.