Archive | Beef RSS feed for this section

Individual Beef Wellingtons – delicious!

10 May

DSCI0625I remember the first time we had a Beef Wellington. I loved it but my husband, who hates to eat meat that is too pink or bloody, had to have his flashed off in the frying pan. When I saw this recipe I could feel my mouth watering but I was quite nervous about what my husband would think of it.  The steak is a fillet and it would have been criminal to overcook it so I decided to go with the recipe. Thankfully they turned out perfectly.  The Parma Ham prevented the pastry from having a soggy bottom and added a lovely flavour to the finished dish.  Fillet steak is obviously not cheap but it is well worth the money for such a beautiful dish. Perfect for a romantic meal for two or a dinner party for special friends.  I served mine with green vegetables as I felt there was enough starch in the pastry for a rounded meal.

The origin of the name is unclear. (Wikipedia)

There are theories that suggest that beef Wellington is named after Arthur Wellesley, 1st Duke of Wellington. Some theories go a step further and suggest this was due to his love of a dish of beef, truffles, mushrooms, Madeira wine, and pâté cooked in pastry, but there is a noted lack of evidence supporting this. In addition to the dearth of evidence attaching this dish to the famous Duke, the earliest recorded recipe to bear this name appeared in a 1966 cookbook.

Other accounts simply credit the name to a patriotic chef wanting to give an English name to a variation on the French filet de bœuf en croûte during the Napoleonic Wars.

Still another theory is that the dish is not named after the Duke himself, but rather that the finished joint was thought to resemble a Wellington boot, a brown shiny military boot named after the duke.

Here is the link to the recipe:  http://www.olivemagazine.com/recipes/beef-wellingtons/4010.html 

This slideshow requires JavaScript.

Cottage Pie! Comfort food at it’s best!!

7 Mar

There are days when nostalgia takes over and you want to eat something great that you remember from your childhood.  This is one of those days!  The sunshine from yesterday has gone, replaced by dark clouds.  Its time to eat something really comforting like Cottage Pie.

I remember eating cottage pie at my Grandmothers on a Monday dinner time.  Dinner time , in those days, was always 1300 hours.  If you were a minute late your dinner would be in the dog!!!!  She would have been a great sea captain! 

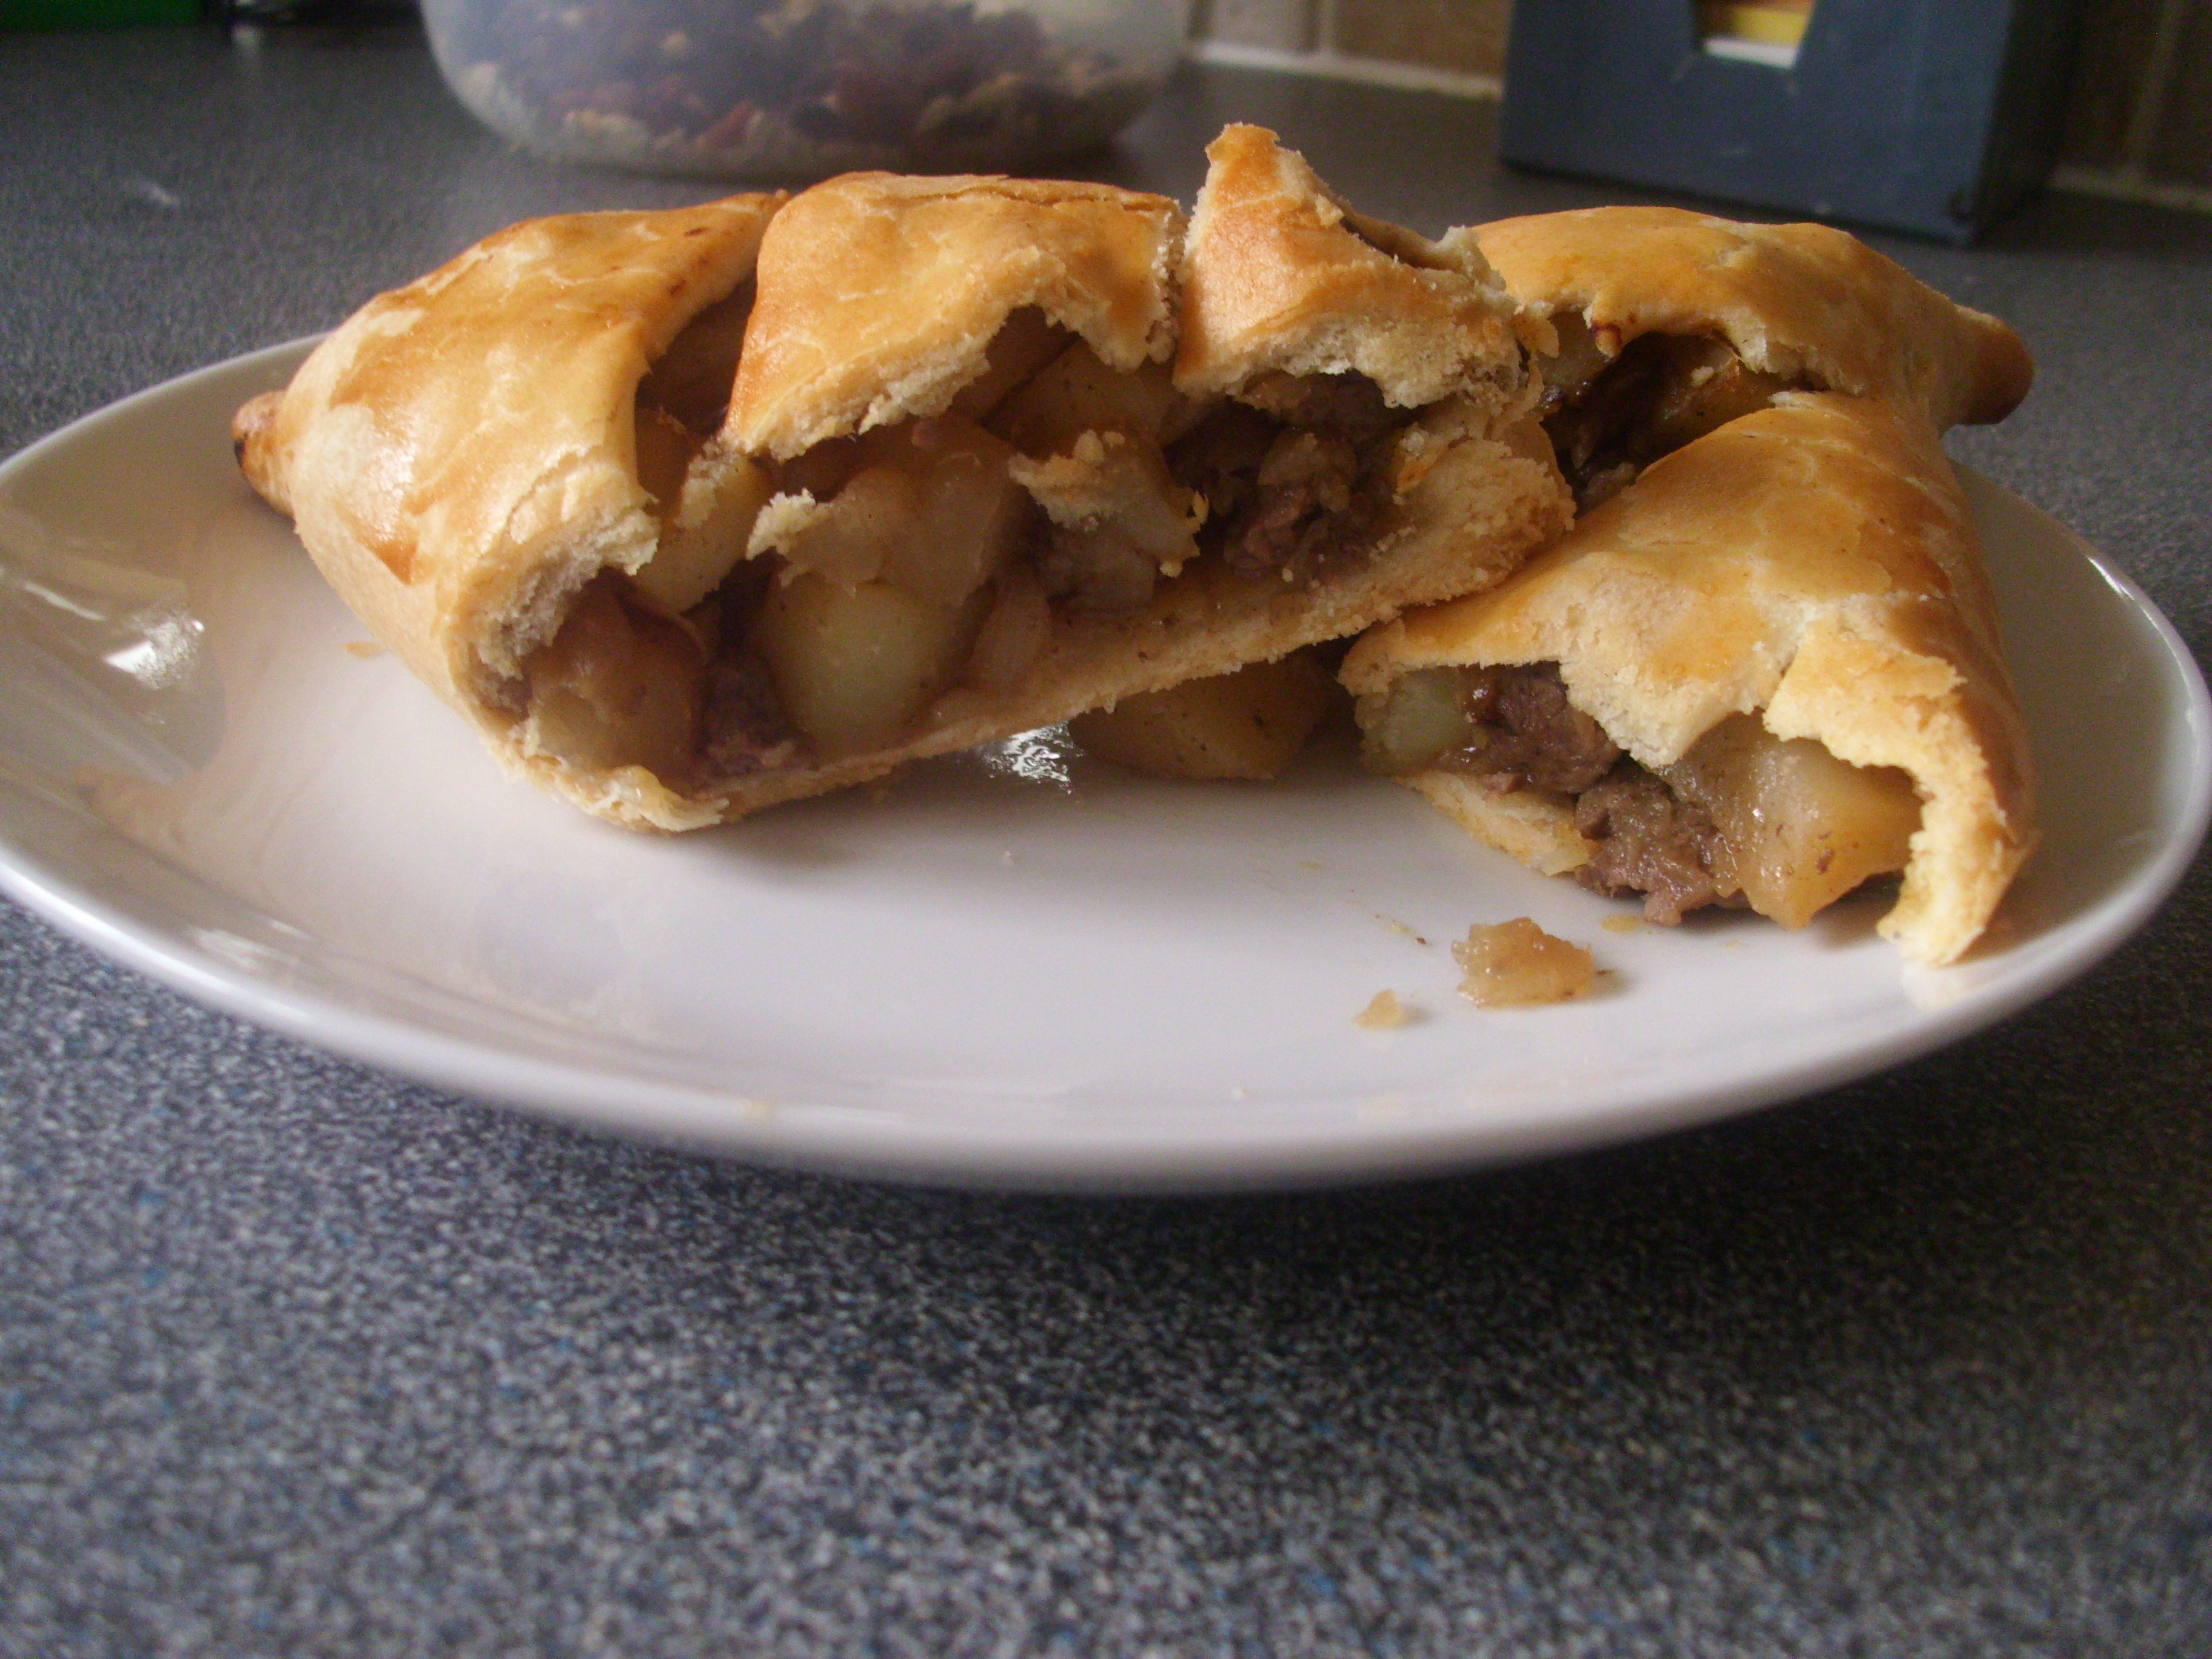
There is something fantastic about the smell of cottage pie as it cooks in the oven and the crunch as the spoon breaks through the crispy edges of the mashed potato to reveal the luscious beef mix below.  Yum!!!!!!!!  Grandma used to make hers using the beef left over from Sunday Lunch.  There was never very much beef, not even on the Sunday, so she would mince it and pad it out with chopped up vegetables.  I suppose it was one way of getting her Grandchildren to eat them.  Whatever the agenda, I know that we all loved her pie.  While we are talking of not wasting food, for tea we would eat dripping from the roast beef, spread onto warm toast and sprinkled with a little salt.  Oh, the memories! 

There are all sorts of variations on the cottage pie.  Shepherds pie is the most common, and is associated with minced lamb rather than beef.  Cottage Pie was first recorded in 1791 when the potato was used by the poor.  Cottage came from the work cottages they lived in.

I’ve tried all sorts of Cottage Pie recipes.  One included baked beans, some with cheese mixed into the potato topping, some tending towards an Italian version, using pancetta and red wine in the beef mix.  All were really tasty and healthy too.  My favourite though has to be my Grandmas version.  I am serving it with boiled cabbage and gravy.  Heaven!

Grandmas’s Cottage Pie          (Serves 4)

  • 1 tbsp vegetable oil
  • 1 onion, roughly chopped
  • 2 carrots, roughly chopped
  • 1 stick celery, roughly chopped
  • 500g (1lb) beef mince (lean)
  • 2 tbsp tomato puree
  • Splash Worcestershire sauce (or to taste)
  • 500 ml (1pt) beef stock
  • 1kg (2 lbs) old potatoes (I use Maris Piper), peeled and cut into 2 inch chunks
  • Knob of butter
  • A little milk.
    1. Heat the oil in a pan then add the onion, carrots and celery.  Fry on a medium heat for about 10 minutes until the vegetables are starting to soften but are not coloured.
    2. Add the beef mince, crumbling to break up any large lumps.  When browned, add the tomato puree and Worcestershire Sauce.  Cook for a couple of minutes, stirring so it doesn’t catch on the bottom of the pan.  Add the stock, mix well.  Bring to the boil then simmer over a low heat for about 30 minutes.
    3. Heat the oven to 180C/160C fan/Gas 4. 
    4. Meanwhile, make the mashed potato.  Add the potatoes to salted boiling water, cover and simmer over low heat until potatoes are tender (about 15 minutes).  Drain well then return to pan.  Add the butter and milk and mash everything together until smooth.
    5. When the beef is ready tip into ovenproof dish.  Top with the potato then bake in the oven for about 20 minutes or until the top is browned and the beef is bubbling around the edges.
    6. If you want to, you can freeze this at the end of Step 4.  Make sure it is cold before you put it in the freezer.  Defrost and continue with Step 5 when you want to eat it. 

      This slideshow requires JavaScript.

    Cornish Pasties – absolutely scrummy!

    3 Nov

    DSCI0414I have always loved meat in pastry, be it pies, puddings or pasties. I know it is not the healthiest of food but it is comfort food at its best. It also brings back fond memories of my childhood as my Grandma was a great pie maker, both sweet and savoury, and I would always make sure I had a place at her table when I knew she was making one.

    I have tried making Cornish Pasties before but have not had a lot of success. This recipe is really easy though with a few shortcuts, like using ready-made pastry.

    Originally the Cornish Pasty was a sort of fast food for miners, fishermen, farmers and children to take to work and school. The pastry would keep the filling warm until lunchtime. the filling would depend on the wealth of the family. The less wealthy families might omit the meat and just use the swede, potato and onion as filling.  Others might use the left over meats such as boiled ham.

    Cornish Pasties seem to be making a comeback in popularity. There is a chain of bakeries all over the UK now that sell them, hot and inviting. The fillings may be far from traditional on occasion but there is no doubt that they are exceedingly good. We recently had one during our visit to Cambridge and my husband thought it was the best he had tasted until he tried these.

    The recipe makes four medium-sized Pasties. I am sure they could be frozen before cooking if you want but don’t bank on freezing any after cooking as the smell and the taste will make them disappear like magic.

    Cornish Pasties                             Makes 6

    • 200g turnip (or swede) peeled and cut into 1/2 inch pieces
    • 2 medium baking potatoes, peeled and cut into 1/2 inch pieces
    • salt and black pepper
    • 2 tbsp vegetable oil
    • 2 onions, finely chopped
    • 500g rump steak, all fat and sinews removed and cut into 3/4 inch pieces
    • 250 ml beef stock made from 1/2 a good-quality stock cube
    • 1 tbsp Worcestershire sauce
    • 500g chilled ready-made shortcrust pastry.
    • 1 egg beaten with a little milk to make the egg wash
    1. Heat half the oil in a large, heavy based frying pan and cook the onions for 5 minutes over a low to medium heat until softened but not coloured. Remove and set aside.
    2. Add the remaining oil and add the meat. Cook over a high heat for 3 – 4 minutes until browned all over. Add to the onions.
    3. Add the stock and Worcestershire sauce and boil rapidly until it reduces to about 2-3 tablespoons. Return the meat and onion to the pan and coat in the gravy. Simmer until there is no excess gravy visible.
    4. In the meantime, cook the potatoes and swede in two separate pans of boiling salted water until just tender. Drain and add to the meat. Allow to cool.
    5. Roll out the pastry until it is about the width of a pound coin.  Using a tea plate as a template, cut out 4 circles.  Spoon the mixture into the middle of each. Egg wash the edges and bring them together.  Crimp to seal. Chill for 30 minutes.
    6. Make two or three slashes in the top of each pasty to allow the air to escape. Brush with egg wash then bake for 20 minutes in an oven preheated to 200C/190C fan/gas 6 then turn down the oven to 180C/170C fan/gas 4 and bake for a further 20 minutes.
    7. Eat hot or cold.


    This slideshow requires JavaScript.

    Low fat Cottage Pie – really delicious

    18 Oct

    DSCI0415I seem to have been on a diet all my life and yet I never seem to get any thinner so I have. at long last, decided that I need to eat more healthily and make subtle changes that will see the weight come off gradually.  This recipe is one of many that I love in Judith Wills book ‘Top 200 low-fat recipes’.  Some of the recipe are my most loved dishes and I make them frequently but this was the first time I had tried this one.

    So what makes this dish lower in fat and yet taste so good.  Firstly I think it must be because of the addition of some vegetables and baked beans. These not only bulk out the mince but give it a lovely flavour. As I used very leans minced beef this was essential.  She also uses herbs and flavourings to bring all the flavours together. I made a slight change in the herbs I used but it still tasted wonderful.  Finally she has replaced some of the potato with parsnip and has used light mayonnaise and low-fat fromage frais to mash them together instead of butter and cream. You would not believe how tasty the topping was. I think I might use this method of making mash in the future!

    Well here is the recipe, only 400 calories for a generous portion.

    Cottage pie                                     Serves 4

    • 1 tbsp groundnut oil
    • 400g extra lean minced beef
    • 1 large onion finely chopped
    • 1 stick celery, finely chopped
    • 1 large carrot, finely chopped
    • 200g can baked beans in tomato sauce, lightly mashed down
    • 1 tbsp tomato puree
    • 1 tsp dried oregano
    • 1 tsp Worcestershire sauce
    • salt and black pepper
    • 300 ml beef stock

    For the topping

    • 400g old potatoes, peeled and cubed
    • 250g parsnips, peeled and cubed
    • 1 tbsp light mayonnaise
    • 2 tbsp low fat natural fromage frais
    • 1 tbsp grated Parmesan Cheese
    1. Preheat the oven to 180C/170C fan/gas 4.
    2. Heat the oil in a large non-stick frying pan and sauté the beef until browned, breaking it up as you go. Transfer to a bowl with a slotted spoon.  In the remaining fat sauté the onion, carrot and celery over a medium heat for about 10 minutes or until softened. Add a little water if it looks as though it is getting too dry.
    3. Return the meat to the pan and mix well. Add the beans, tomato puree, herbs, Worcestershire sauce, black pepper and stock.  Mix together really well then bring to the boil. Reduce the heat, cover and simmer for 45 minutes, stirring occasionally. Add a little water if it looks too dry and is sticking to the pan.
    4. Meanwhile make the topping. Bring a pan of salted water to the boil, add the potatoes and parsnips and simmer until tender. Drain. Mash them with the mayonnaise and fromage frais, season to taste them mash again. If the potato seems too dry add a little skimmed milk.
    5. when the meat is cooked, adjust seasoning if necessary then pour into a shallow oven dish.  Put the potato mix on top and smooth out then sprinkle with the cheese.
    6. Bake for 25 minutes or until golden brown and bubbling underneath.

    This slideshow requires JavaScript.

    Keema curry – so versatile and great for kids!

    18 Jul

    For those who do not know it, keema curry is made from minced beef.  This dish is great for kids as it is mild and really tasty.  It is versatile too.  I use it to make stuffing for my Whole Curried Poussin (recipe to follow at a later date) and it goes great with jacket potatoes for a healthy supper.  Make lots as it freezes really well without the peas, as these have been frozen once.  Just add the peas before reheating, fantastic.  Apparently, Keema curry is one of the least favourite choices in Indian cuisine.  I am as guilty as the next person for never trying it in an Indian restaurant but I will definitely make it more often at home in the future.  Always buy good quality mince meat otherwise you will have a greasy meal but, other than that, this recipe is virtually indestructible.  It is great for novice curry cooks as there is no risk of overcooking the meat or the meat being too chewy and, in the current climate, it makes a fantastic meal for pennies!  Any type of mince will do, even quorn or soy mince for vegetarians.

    When mince pies where first made in the 16th Century, they contained shredded meat that was bulked out by dried fruit and spices.  The spices were brought over from the Holy Land and it was thought important to add three spices to the pies to represent the gifts taken to Jesus by the Three Wise Men.  There are a few superstitions about mince pies.  Being a Derbyshire lass I always like to know about these so I have listed a few below.

    • It was thought lucky to eat one mince-pie on each of the Twelve Days of Christmas, ending on the 6th January. 
    • Bad luck would also be the curse if you stir the mincemeat the wrong way when making it.  Always stir it in a clockwise dierction.
    • Refusing a piece of mince pie at Christmas dinner means you will have bad luck for the coming day. Some sources, on the other hand, say you’ll have bad luck for a whole year. So eat up.
    • Mince pies should always be eaten in silence.
    • Never cut a mince pie with a knife as you will cut your luck.
    • Make a wish when you eat your first mince pie of Christmas.

    Well here is the recipe.

    Keema curry                                                  Serves 6

    • 2 lb lean minced meat (beef, pork, lamb, chicken or vegetarian options)
    • 2 tbsp unsalted butter
    • 1 large onion, finely chopped
    • 2 cloves garlic, finely chopped
    • 2 inch piece of root ginger, finely chopped
    • 1 tsp turmeric
    • 1 tsp ground coriander
    • 1/2 tsp red chilli powder
    • 4 cloves, ground
    • 1 brown cardamom, ground
    • 400g can chopped tomatoes
    • 1 tbsp tomato ketchup
    • 200ml canned tomato soup (I use Heinz)
    • 1 red pepper, chopped
    • 1 green or red chilli, chopped finely
    • 2 tbsp garam masala
    • 1 tbsp chopped fresh coriander
    • 1 tbsp chopped fresh mint 
    • Handful of frozen peas
    • Wedges of hard-boiled egg to garnish (optional)
    1. Heat half the butter in a large, lidded saute pan and fry the mince for about 10 minutes until brown all over.
    2. In a separate pan or wok, heat the remaining butter and stir fry the onion, ginger and garlic over a medium heat until golden.  Add the turmeric, ground coriander, chilli powder, cloves and cardamom.  Mix well, adding a little water if the mix seems too dry.
    3. Preheat the oven to 190C/180cC fan/gas 5.  Add the stir fry to the mince with the tomatoes and ketchup.  Mix well, cover and cook in the oven for 20 minutes.
    4. Take the dish out of the oven and stir in the soup, red pepper, chilli and garam masala.  Return to the oven and continue to cook for a further 30 minutes. 
    5. Switch off the oven and remove the dish.  Stir in the peas, mint and coriander.  Return the dish to the oven for a few minutes to enable the peas to warm through.
    6. Freeze at the end of Step 5 in rigid containers if required and thaw completely before reheating.
    7. Serve with rice, garnished with wedges of boiled egg if desired.

      This slideshow requires JavaScript.

    Corned beef hash with a kick – a great supper dish!

    28 Mar

    My first taste of corned beef hash was made by my Aunty Bella.  She would be the first to admit that cooking is not her forte, but it tasted delicious, even though it looked a bit off-putting as all the ingredients were mushed together. I made it like this for years, and even packed it into a pie crust to make hash pie.  I have to say that the pastry did make it look more presentable.  Over the years I suppose I have picked up more cooking techniques.  It is true what they say, practice does make perfect although I am a long way from this Utopia at the moment.  The hash I make today is a far cry from my earlier attempts.  Each element of the dish is defined, the potatoes have a crisp outside but are tender and fluffy in the middle, there is an addition of heat from the chopped chillies and the parsley adds a freshness that lifts the dish into a new dimension.

    It was interesting to read why the term ‘corned’ was used for this type of beef.  The term “Corned” comes from putting meat in a large crock and covering it with large rock-salt kernels of salt that were refered to as “corns of salt” This preserved the meat. The term Corned has been in the Oxford English Dictionary as early as 888 AD.   Salting meat goes back probably to ancient times in cold areas when they found that meat didn’t spoil if it made contact with enough salt.  This was a boon for soldiers and was actually the mainstay for British Soldiers in the Boer War and World War 1.

    I was under the impression that corned beef came from Argentina and Uruguay.  I suppose that is down to Fray Bentos!  It is true that todays supplies come from these countries but, it appears that the origin of corned beef is Ireland.  In the 17th Century Ireland was, in fact, the first Country to make Corned Beef instigated by restrictions on exporting live cattle under the Cattle Acts of 1663 and 1667.  The Irish did not actually et Corned Beef themselves but exported it, canned, in large quantities to England.  The English called it Bully Beef and was the best source of beef during food rationing during the war.  It was the Irish immigrants to America that made the dish ‘Corned Beef and Cabbage’ popular in the US.  This is still eaten in huge quantities on the 17th March, St Patrick’s Day.

    Well, here is the recipe.  I serve mine with a fried egg.  Makes a great brunch the morning after the night before, if you know what I mean!

    Corned Beef Hash with a kick                 Serves 4

    • 3 tbsp vegetable oil
    • 1kg / 2 ibs waxy potatoes (eg Charlotte), diced into small pieces
    • 1 onion, chopped
    • 1 x 340g can Corned Beef, cut into 1 inch cubes
    • 1 red chilli, seeded and thinly sliced
    • handful of chopped fresh parsley leaves
    1. Heat the oil in a large frying pan over a medium heat and fry the potatoes, stirring occasionally, for about 15 minutes or until they are starting to turn colour.  Add the onion and continue to cook for 10 more minutes until the onion is soft and the potatoes are golden.
    2. Add the chilli and corned beef carefully stir together, then cook for 6 minutes until the hash is starting to go crispy in places.  Stir in the parsley and season with salt and black pepper.
    3. Serve hot, topped with a fried egg.

      This slideshow requires JavaScript.

    Beef Roganjosh – perfect to come home to after early doors at the pub.

    31 Jan

     The recipe I have chosen today is one that I have cooked many times over the years.  We normally have some sort of chicken curry on a Friday but this week I fancied beef.  It is difficult to find a recipe for beef curry, as a number of religions, cattle are considered sacred.  Some regions, especially India, have banned the slaughter of cattle and eating the meat is taboo.

    It is possible that the cow was considered sacred because it had a major role in the lives of the Vedic people.  They used the milk to make dairy products and the cow itself to till the ground.  Even the cow’s excrement was put to use, as fuel, fertilizer and for producing  psilocybin mushrooms.  These grow naturally from the cow dung and, in modern-day, are known as magic mushrooms!  There are some scholars who disagree that the cow has always been sacred.  They can cite early Hindu scriptures that show cows and oxen were killed and eaten in ancient times.  Today, there are some Hindus who eat beef.  In fact, the Dalit Hindus, who have always eaten meat, often protest about having their cow eating rights taken away from them.

    If anyone who reads this recipe does not eat beef for religious reasons,  lamb can be substituted.  The cooking time may, however, need to be reduced.

    Beef Rogan Josh         Serves 4

    • 2 tbsp ghee (clarified butter) or vegetable oil
    • 2lbs braising beef, trimmed of all fat and sinews and cut into 1 inch cubes
    • 4 bay leaves
    • 1 tbsp salt
    • 1 pint/600 ml hot water

    Spices

    • 2 brown cardamoms
    • 6 cloves
    • 6 black peppercorns
    • 1 tsp cumin seeds
    • 2 inch piece cinnamon stick

    Vegetable Mix

    • 2 tbsp ghee or vegetable oil
    • 1 onion, chopped
    • 4 green cardamoms
    • 4 tbsp tomato puree
    • 150 ml full fat natural yogurt

    Paste

    • 1 onion, roughly chopped
    • 6 cloves garlic
    • 1 tbsp coriander seeds, roasted
    • 1 oz/25 g root ginger
    • 1 tsp red chilli powder
    • 1.5 tsp turmeric powder
    • 1 tsp garam masala
    1. Preheat an oven to 160C/150C fan/gas 3.
    2. Grind the spices in a small grinder.  Melt the ghee in a large pan and fry the beef, bay leaves and spices together for about 15 minutes, over a low heat.  Remove with a slotted spoon and set aside.
    3. Melt a little more ghee, if necessary, in the pan and fry the onion and cardamom in the vegetable mix together. gently, until the onions are golden, about 10 minutes.  Add the tomato puree and mix well.
    4. Place all the paste ingredients in a small food processor and blend to a smooth paste.  Mix the paste into the vegetables and cook, stirring continuously, for 5 minutes.  Add the yogurt and cook, stirring, for a further 5 minutes.  Stir in the meat, salt and water.  Transfer to an ovenproof dish with a lid, cover and cook in oven for 2 hours or until the beef is meltingly tender.  Check occasionally to ensure it is not drying out and add a little more water if necessary.

      This slideshow requires JavaScript.

    Paella for a friend.

    12 Feb

    A friend has asked me to make a Paella dish that does not contain seafood.  I love Paella and often choose it when we are eating out on holiday in Spain.  It can be hit or miss though and, when watching cooking demonstrations in Fuerteventura, I can see why!  It seems adding the ingredients is an exact science.  I am quite nervous that this is going to turn out like a sticky mass.  Still, always up for a challenge!! The first time I had Paella was in 1991, cooked on a wooden fire, on the beach in Nerja.  The cook, Chiringuito Ayo, has been making massive dishes of paella in this way for over 40 years.  Chiringuito is quite famous in Nerja.  When he was a boy, in 1959, he was playing with some friends from his village, Maro, when they climbed through a small hole and discovered the famous Caves of Nerja.  Imagine their surprise when they were confronted with this! The dish originated in the Valentia Region of Spain and is typically made in a large, shallow pan called a paellera.  Making paella is often a man’s activity in Spain.  I suppose this equates to barbecues in the UK, as they make it outdoors on an open fire made of orange and pine wood.  The one thing that appears to come through from my research, is that the recipe is adapted to suit personal taste, with the exception of a few key ingredients.  The Spanish make it look so easy!  I remember this chef doing a cooking demonstration in our hotel once.  The paella was delicious! Well, I’ve dusted off my paella pan that I bought in 1991 and have never used, and here goes.  I have chosen a variety of meats for this recipe.  If you choose to make it, you can add or omit, according to your own taste.  You can also add raw prawns and fresh mussels to make a mixed paella, but leave these until the last 5 minutes of cooking or they will be overcooked.  You will need special rice for this and it must be short grain.  I could not find Paella Rice so I used Carnaroli.  I made mine on the barbecue.  You will need a kettle barbecue and we let the coals burn for 15 minutes before we started cooking (you don’t have to let the coals go grey). The recipe below is for those who do not have a barbecue, just keep the same cooking times if you do! Meat Paella   Serves 4 (hungry people)

    • 12 oz (350g) rice
    • 2 tbsp olive oil
    • 4 chicken thighs, bone in, cut in half
    • 8 oz (225g) sirloin steak, fat removed, cut into 1 inch cubes
    • 8 oz (225g) tenderloin pork, fat removed, cut into 1 inch cubes
    • 4 oz (110g) raw chorizo sausage, cut into 1/2 inch dice
    • 1 large onion, peeled and roughly chopped
    • 1 red pepper, deseeded and cut into 1/2 inch pieces
    • 2 cloves garlic, peeled and crushed
    • 1 heaped tsp paprika
    • 1/4 level tsp cayenne pepper
    • 1/2 level tsp saffron strands
    • 8 oz (225g) ripe tomatoes, skinned and roughly diced
    • 20z (50g) frozen peas
    • Salt and pepper
    • 1 lemon, cut into wedges to garnish
    1. Prepare everything as per ingredient list before you start making the paella, you will not have time to mess about between each step!
    2. Heat the oil in the pan over a fairly high heat.  Season the chicken and add to pan, saute on all sides until golden brown.  Remove and set aside.  Do the same with the beef and lastly the pork.
    3. Next, add the onion, pepper and chorizo and fry these over a medium heat for 6-8 minutes, or until they are browning at the edges.  Add the garlic, paprika, cayenne and saffron and cook for another minute, making sure the garlic does not burn.  Return the meat to the pan, followed by the tomatoes, plenty of seasoning and 2 pints (1.2 litres) of boiling water.  Bring everything to a gentle simmer, turn down the heat and cook, uncovered, for 10 minutes.
    4. Push the meat to the edges of the pan and pour the rice into the centre.  Bring everything back to the boil, give it a stir so all the rice is covered by liquid, and simmer, uncovered for about 10 minutes. Shake the pan occasionally to distribute the rice and make sure it is evenly cooked
    5. Add the peas and continue to simmer for 10 minutes until the moisture has been absorbed.  Remove from the heat and cover with a clean tea towel for 5 minutes to absorb the steam.
    6. Serve with lemon wedges.

      This slideshow requires JavaScript.